
Hooklink for a pop-up, wafter or bottom bait? How to match the presentation?
A rig for a sinking bait should allow it to rest on the bottom while giving the hook freedom to work, whereas a pop-up rig should keep the bait suspended above the lakebed. With a wafter, you need to check how its buoyancy works together with the weight of the hook and attachment; in my rigs, I expect the bait to sit slightly raised, with the hook lying flat on the bottom. I always make the final choice after testing it in water, with the bait mounted on the finished rig.
Add Rockworld-carpshop.com to your preferred sources in Google!
Table of contents
- What is the difference between presenting a pop-up, a wafter and a bottom bait?
- Bottom bait rig: hook freedom on the lakebed
- Wafter rig: balance and stable hook positioning
- Pop-up rig: presentation height and weighting
- How does bait attachment affect presentation?
- How do you test a ready-made baited rig in water?
- The most common mistakes when matching bait presentation
- Questions and answers about bait presentation
What is the difference between presenting a pop-up, wafter and bottom bait?
The difference is best assessed by submerging the entire rig. A bait taken straight from the packet does not yet show how it will behave when combined with a hook, bait screw, micro swivel and other components.
| Bait type | Expected presentation | Examples of suitable rig constructions | What should you check? |
|---|---|---|---|
| Bottom bait | The bait rests on the lakebed, allowing the hook to work freely | Classic hair rig, Blow Back Rig, Combi Rig with a suitable hook section | Does the bait restrict the hook's movement and does it allow it to rest freely on the bottom? |
| Wafter | The bait's buoyancy partly counterbalances the weight of the hook; in my rigs, the hook remains flat on the bottom | Blow Back Rig, KD Rig, a suitable D-Rig or Ronnie/Spinner variant | Does the bait lift the hook more than intended? |
| Pop-up | The bait stays above the lakebed, lifting the hook as well. | Ronnie Rig, Chod Rig, Hinged Stiff Rig | Is the buoyancy sufficient to lift the appropriate part of the rig, while the weighting keeps the presentation close to the bottom? |
The names indicate families of rig constructions. Individual variants may differ in bait attachment, weighting position and hook mechanics. A Ronnie Rig can be used with different types of bait, but changing a pop-up to a bottom bait requires the entire presentation to be assessed again.
I discuss the construction of individual rigs in more detail in the guide to selecting a carp rig for the bait and fishing conditions.
Rig for bottom bait: hook freedom on the lakebed
A bottom bait, sweetcorn or tiger nut without any added buoyancy naturally rests on the lakebed. With this presentation, the position of the hook next to the bait and the space left between them are important.
A classic hair allows the bait to be separated from the hook. In a Blow Back Rig, the way the hair is routed also allows it to move along the hook shank. This type of section can also be used in a Combi Rig, combined with a stiffer section of the rig.
Sweetcorn and a large bottom bait require different spacing
With sweetcorn, I leave a small gap between the grains and the hook bend. With a large 24 mm bottom bait, I use a much bigger gap. In this setup, I want the hook to be able to lie flat on the lakebed next to the bait.
I therefore do not use the same hair setting for different baits. After fitting a larger bait, I assess the distance from its surface to the hook, as well as whether the bait restricts its movement.
I describe the measuring method and specific examples of hair and full rig lengths in the guide what length carp rig to choose.
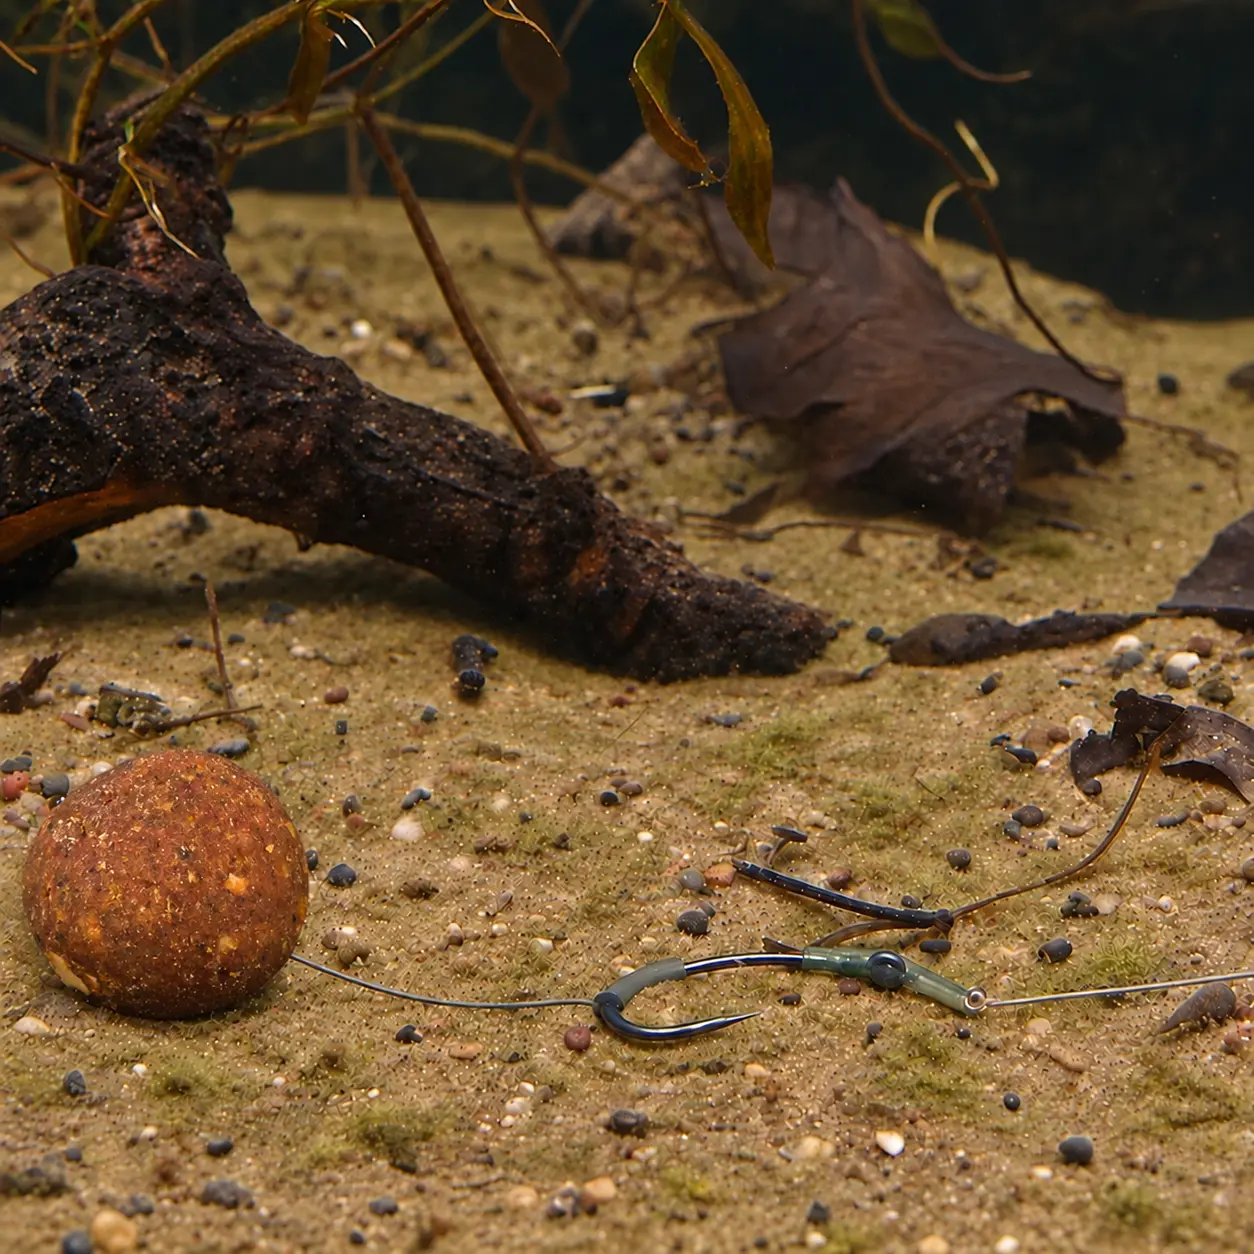
With a large bottom bait, I leave enough space for the hook to lie flat next to the bait.
A bottom bait also requires available space on the lakebed. If the bait and hook disappear beneath leaves or into soft silt, a correctly made hair will not solve the problem. In that case, the placement of the rig and the suitability of using a bottom presentation should also be assessed.
Rig for a wafter: balance and stable hook position
A wafter allows for a balanced presentation close to the lakebed. However, the result depends on the specific combination of bait and hook. The same wafter can behave differently after changing the hook model or replacing a light bait attachment with a heavier bait screw.
Before placing the rig in the swim, I always test such a combination in water. I am interested in both the rate of sinking and the final position of the bait and hook.
What presentation do I look for in my rigs?
With a wafter, I expect the hook to lie stably and flat on the lakebed, with the bait slightly lifted above it. I do not want a balance where slight water movement can easily lift the hook or move the entire rig along the bottom.
The reason is the possibility of picking up a piece of leaf, a small stick or other debris from the bottom on the hook point. Debris on the point can prevent the fish from being hooked properly.
Therefore, I look for a compromise. The bait's buoyancy should partly counterbalance the hook's weight, but in my presentation the hook should remain stable. This is my method of setting up these rigs, not a definition of every rig intended for a wafter.
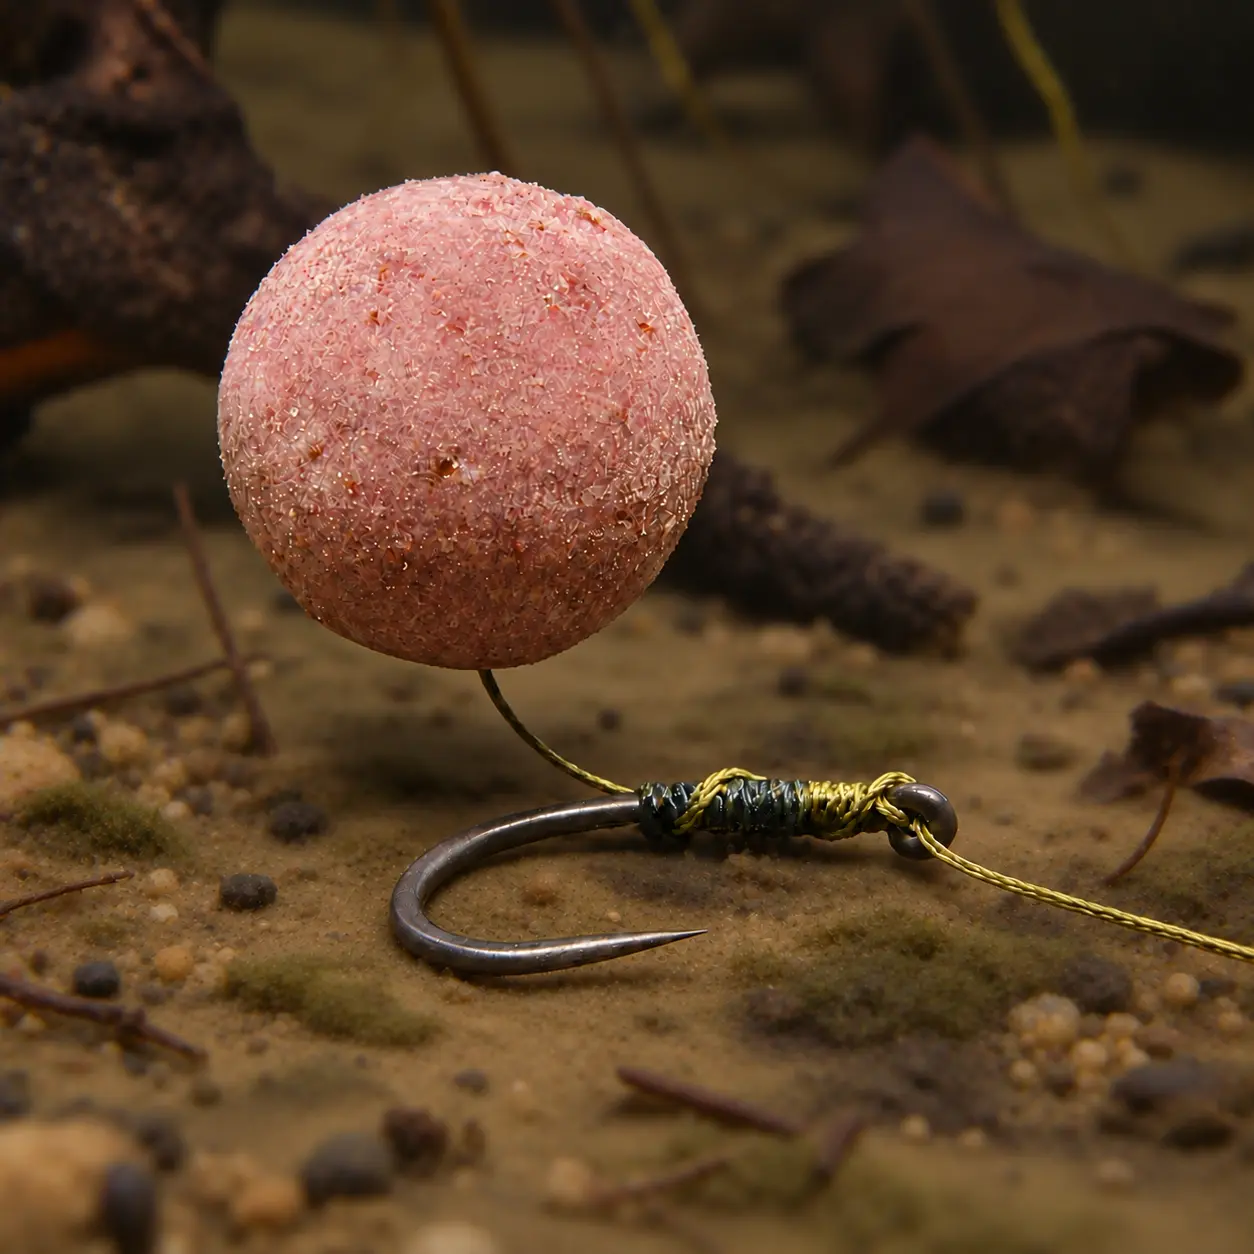
In my wafter rigs, I look for a slightly lifted bait and a hook lying stably and flat on the lakebed.
What should be adjusted if a wafter lifts the entire rig?
First, it is necessary to determine whether the problem is excessive bait buoyancy in relation to the weight of the components used. Possible adjustments include choosing a less buoyant bait, reducing its volume by removing part of it, or weighting the rig appropriately.
Changing the hook also affects the result, but the hook must still match the bait, rig construction and fishing conditions in size. Increasing its size solely to sink the wafter may lead to a random combination of components that will not always be effective. After every adjustment, another water test is required.
Rig for a pop-up: presentation height and weighting
A pop-up is intended to keep the bait above the lakebed. The height and hook position result from the rig construction and the location of its weighting.
In a Ronnie Rig, the presentation is linked to the connection between the hook and the Spinner swivel. A Chod Rig uses a short, stiff hook section working within a suitable helicopter setup. A Hinged Stiff Rig provides different geometry through the hinged connection between the hook section and the boom.
Therefore, the term „pop-up rig” alone does not define one specific bait height above the lakebed.
Why do I balance pop-ups to sink slowly?
With pop-ups, I prefer a balance that is only just sufficient to sink the presentation. In a water test, the rig should settle slowly, while the bait remains at the height determined by the rig.
In the presentations I use, including the Chod Rig and Ronnie Rig, the hook point is positioned higher than in the wafter setup described earlier. For this reason, I accept more delicate balancing and easier movement of the bait.
This does not mean complete protection against debris. Leaves or fragments of vegetation can still interfere with the rig's performance, but thanks to the greater distance from the bottom, I believe this happens less often. Here too, I check the rig's behaviour in a bucket or by the bank before casting it out.
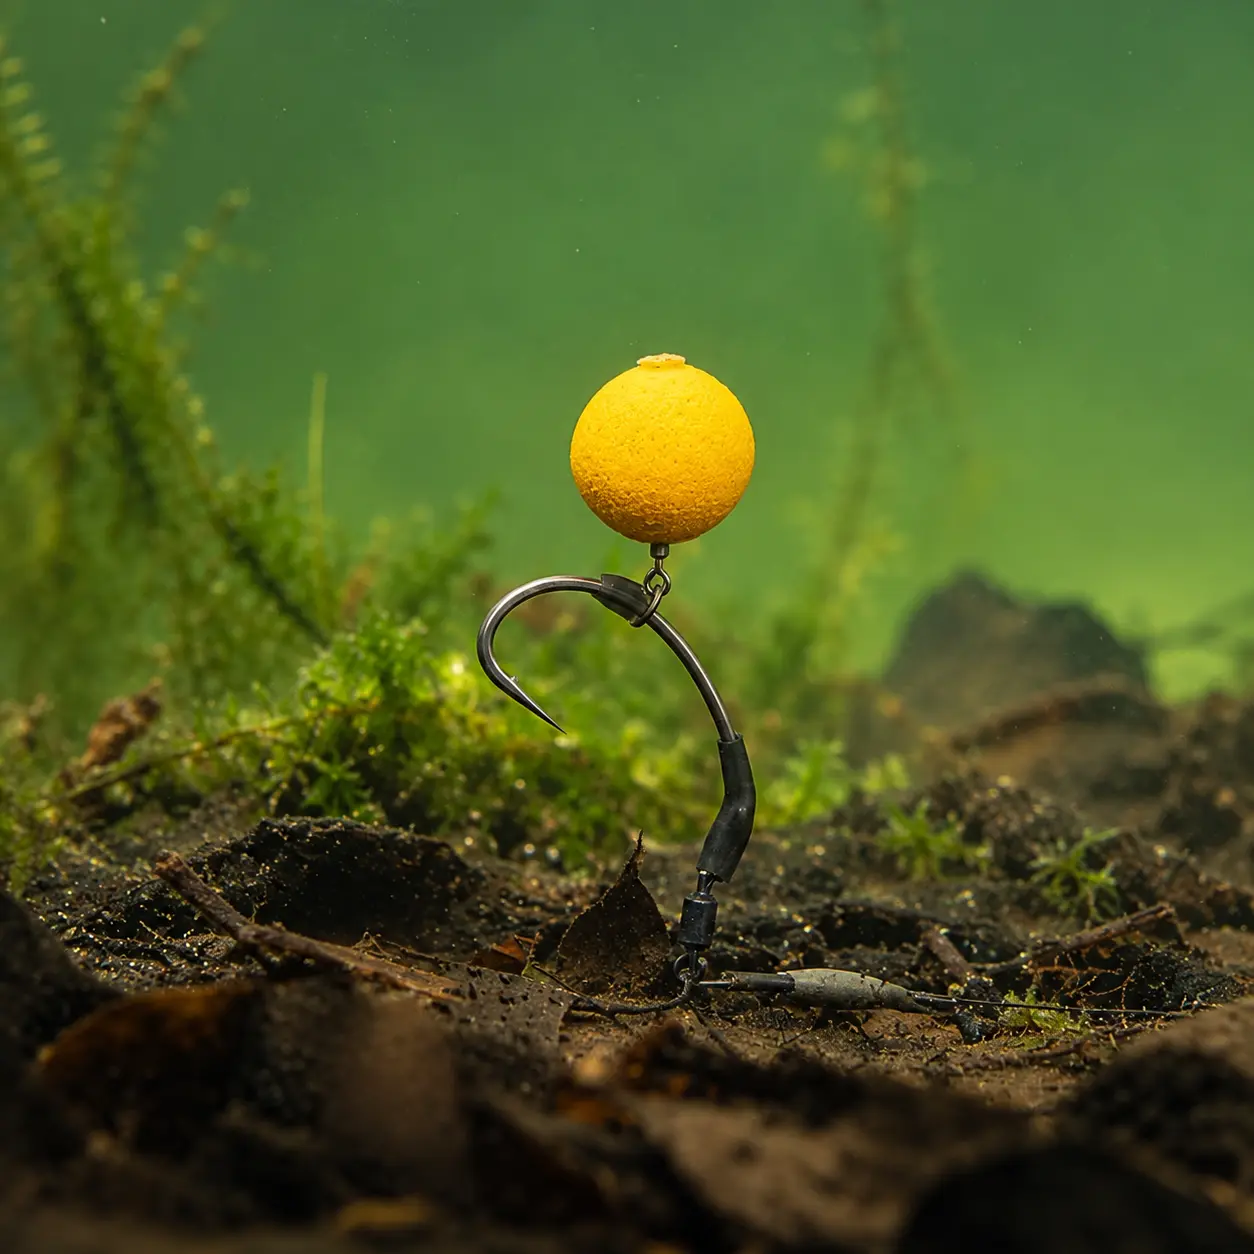
In a pop-up presentation, the position of the bait and hook results from the rig construction and the location of its weighting.
Split shot, a weight with a rubber sleeve or tungsten putty?
When balancing buoyant bait, I most often use lead split shot or special weights attached with a rubber sleeve. I choose the solution that maintains the required balance and suits the mounting point in a particular rig construction.
When using split shot, the possibility of damaging the rig material during crimping must be considered. Weights with a rubber fixing element prevent the line from being directly crushed by metal split shot, but they also require correct fitting and checking of the attachment.
The weighting position should result from the rig construction. In a Ronnie Rig, weights designed to fit the body of the Spinner swivel are available. With a Chod Rig, the weight of the swivel and leader must also be considered, if one is used. The weighting should not block components that need to remain mobile.
I also sometimes use tungsten putty. However, I take into account the possibility of it moving or being lost during casting and when the rig hits the water. On waters with crayfish, I also consider the risk of the plastic mass being removed by these animals. Therefore, I more often choose split shot or suitable weights with a rubber locking sleeve.
When choosing weighting for carp rigs, weight, attachment method and compatibility with the specific rig component are important.
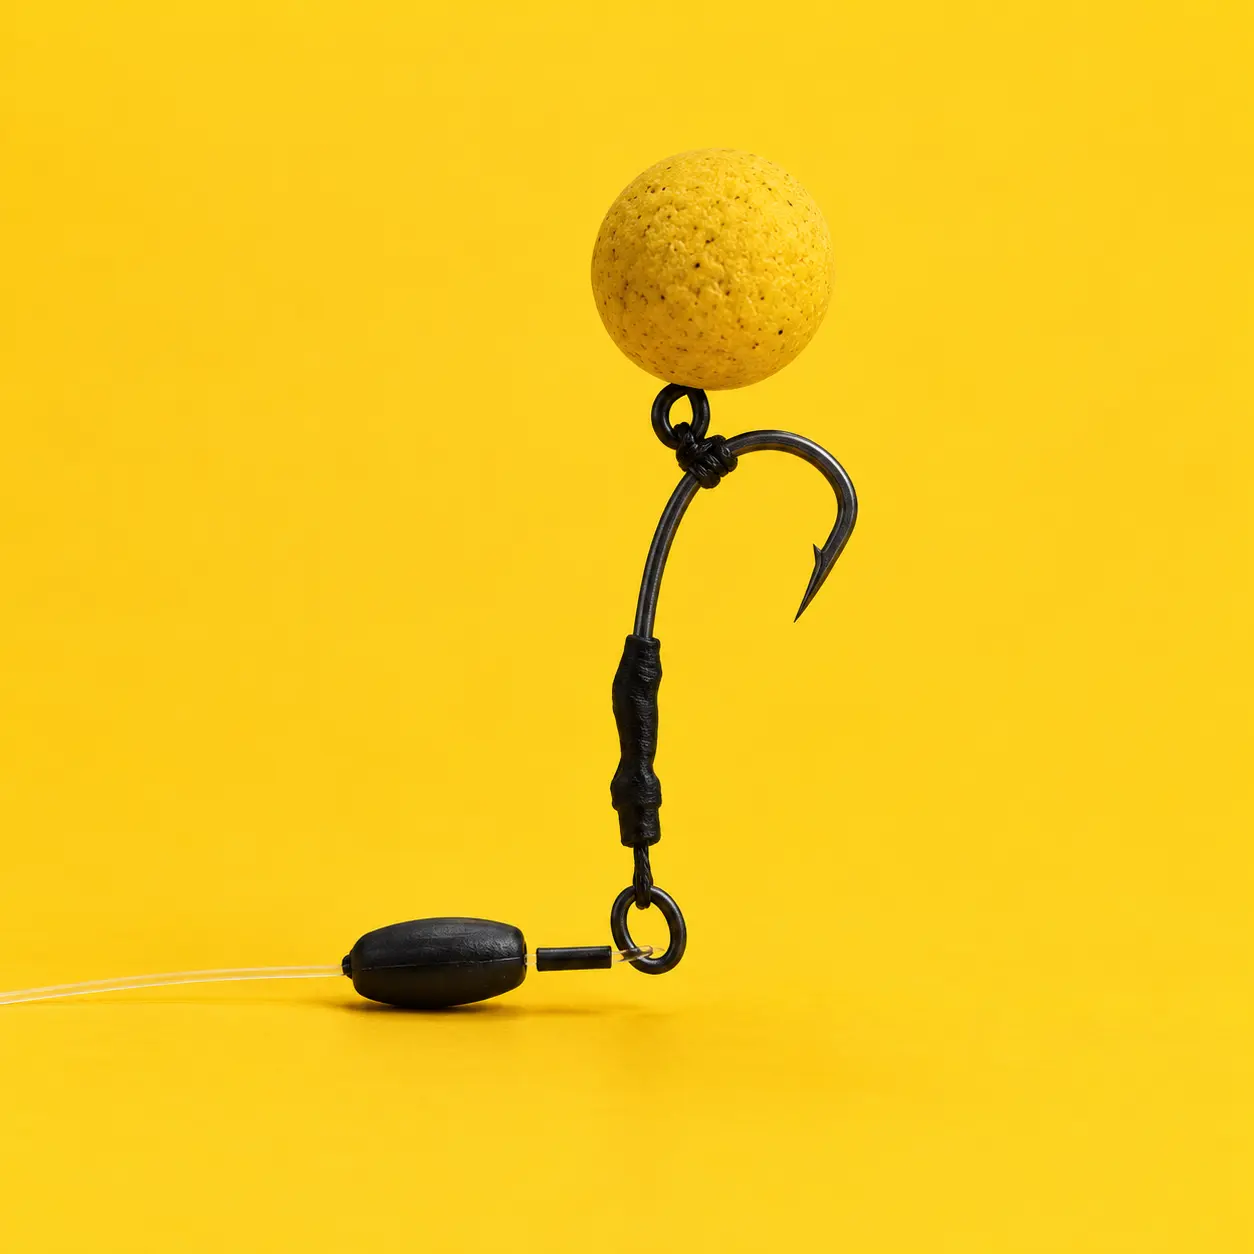
The weighting should maintain the chosen presentation and remain securely attached without damaging the rig material.
How does bait attachment affect presentation?
A hair, bait screw and micro swivel differ in weight and in the way they connect the bait to the hook. Replacing one attachment with another can therefore change the balance even when the bait and hook remain the same.
With a classic hair, the space between the bait and hook should be assessed. With an attachment on a micro swivel or D-loop, the freedom of movement of this component is important. The bait should not jam the attachment or restrict the movement of parts that need to slide.
Especially with lightly balanced baits, the additional weight of a bait screw or swivel can be noticeable. After changing the attachment, the sinking behaviour and final position in water need to be checked again.
The freedom of the hook section is also affected by the material. I cover its selection for particular rig constructions in the guide which material to choose for a carp rig.
How do you test a finished baited rig in water?
The test should include the finished rig with the intended bait, hook, attachment and weighting. Testing the bait alone shows its behaviour without the components that will later change its balance.
A transparent container filled with water is useful for observation. It allows you to view the presentation from the side, including the position of the hook point, which is not always clearly visible when looking from above.
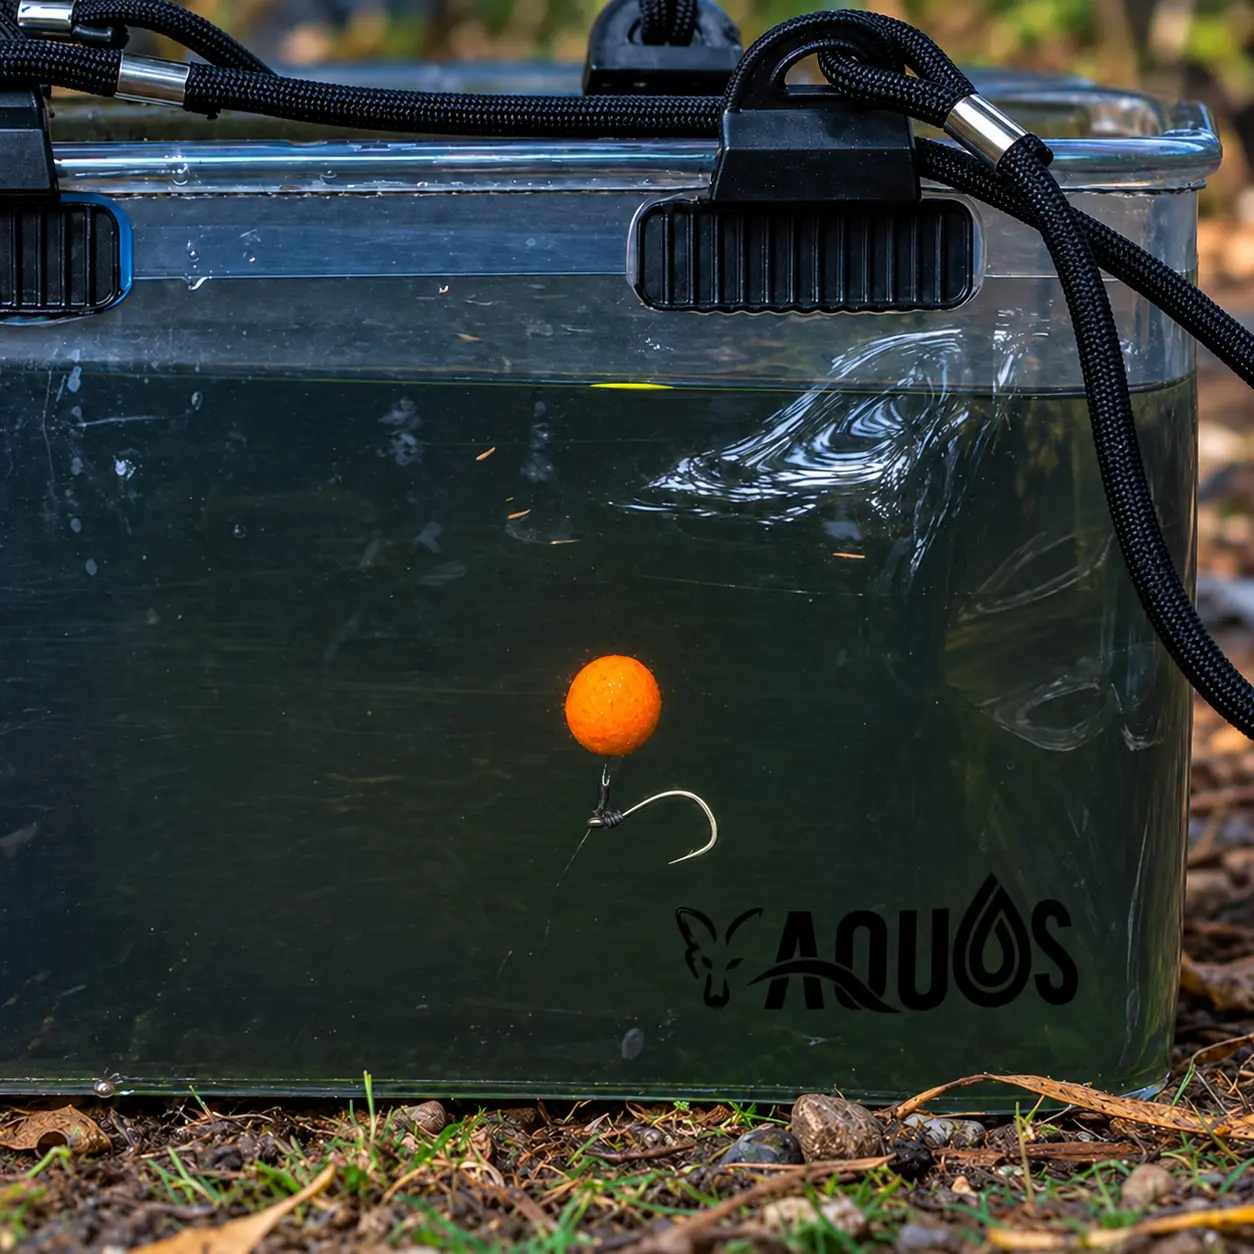
A water test should include the entire rig with the intended hook, attachment, bait and weighting.
When checking the presentation, the following order can be used:
- Fit the bait exactly as it will be used while fishing.
- Submerge and wet the rig, releasing any visible air bubbles.
- Allow it to sink without supporting the hook section or pulling the material tight.
- Observe the position of the bait, hook, point and weighting.
- Check that the bait attachment and moving connections work freely.
- Repeat the test after changing any component that affects the presentation.
With baits soaked in liquid, for example a dip, their behaviour after this preparation is also important. Liquid penetrating inside may increase the bait's weight and change its buoyancy. The result obtained before soaking may therefore not match the later presentation.
A test in a container allows you to assess the balance and geometry of the rig. However, it does not confirm that after casting, the rig will settle identically on uneven, silty or weed-covered lakebeds.
Most common presentation matching mistakes
Choosing a hook solely by its size number
A common mistake I see is failing to match the hook to the bait and the expected rig mechanics. For example, combining a heavy size 2 hook with a 15 mm wafter is, for me, a reason to check the presentation carefully. The bait may not counterbalance its weight sufficiently and may sink differently than intended.
However, the hook number alone is not enough to consider such a combination incorrect. Individual models differ in weight, wire gauge and shape, while baits differ in buoyancy. A larger hook with a small bait may also result from a deliberate choice of rig construction or fishing conditions.
Therefore, the balance, accessibility of the hook point and freedom of movement of the entire setup should be assessed. Detailed selection is described in the guide what hook size to choose for carp.
Other mistakes that can be spotted before casting the rig
| Mistake | Possible result | What should be improved? |
|---|---|---|
| Testing the bait alone | The result does not account for the weight of the hook and attachment | Repeat the test with the finished rig |
| Changing the hook or bait screw without retesting | A different sinking rate or bait position | Check the presentation after changing a component |
| Placing weighting on a moving connection in a way that blocks its movement | Restricted movement required for a particular rig construction | Match the position and attachment method of the weight |
| Skipping the check after soaking the bait in dip | The buoyancy may differ from before | Check the bait after its final preparation |