
How to Properly Use a Carp Mat? Setting Up Your Spot and Common Mistakes
Unfold the carp mat before you start fishing, set it up securely, and prepare the necessary equipment for handling the fish nearby. Just before placing the carp on the mat, check the cleanliness, temperature, and moisture of the surface, and organize unhooking, possible weighing, and photographing to minimize the time the fish spends out of the water. Even a well-chosen cradle cannot replace proper preparation of the fishing spot and constant control over the fish.
Add Rockworld-carpshop.com to your preferred sources in Google!
Table of contents
- How to prepare the area for the carp mat?
- What should be near the mat before the first bite?
- How to prepare the mat’s surface before placing the fish?
- How to transfer the carp from the water onto the mat?
- How to handle the fish during unhooking?
- What to do if the carp starts thrashing?
- How to organize weighing and photos over the mat?
- How to safely release the carp?
- Common mistakes when using the carp mat
- FAQ — questions about mat usage
How to prepare the area for the carp mat?
Choose the fish handling spot before casting your rods. Check the surface under the mat and the path you will carry the carp from the water and back.
A short route over slippery stones or a steep bank section may be less safe than a slightly longer but stable approach. Remove bags, buckets, and other gear from the path. Pay attention to protruding roots, branches, and places where you can easily lose balance.
When preparing my own spot, I look for a place where I can comfortably kneel by the mat from different sides. I also leave space for possible weighing equipment. This way, after taking the fish out, I don’t have to move buckets, shift the mat, or look for a place for my feet.
Stable setup and easy access
A mat lying on the ground should have an even, cleaned surface underneath. Check that there are no stones or sharp objects under the mattress. For cradle-style mats, unfold the frame, activate the locks, and set the legs according to the model’s instructions. The structure should not wobble or slide.
Place accessories close by but outside the area where you will kneel. A bucket placed right at the edge can hinder a quick reaction to the fish’s movements.
If possible, choose a spot sheltered from direct sunlight. Remember that shade moves during the day. A spot prepared in the morning may need reassessment after a few hours.
Plan the photo background in advance as well. The natural scenery of the fishing spot looks good in the frame, but priority goes to stable ground and safe access to the water.
If you are still assembling your gear, check how to choose a carp mat. The main guide includes a comparison of constructions and tips on size and fitting the mat to the fishing spot.
What should be near the mat before the first bite?
Prepare your gear so that you don’t have to leave the mat while handling the carp. Necessary accessories should be accessible from the position where you will handle the fish.
| Equipment | What to prepare in advance? |
|---|---|
| Bucket with water from the fishing spot | Place it within arm’s reach, outside the passage. On warm days, monitor the water temperature. |
| Hook removal tool | Keep it in an easily accessible place, outside the surface intended for the fish. |
| Fish wound care product | Check the usage instructions and prepare the packaging so you don’t have to look for it after unhooking the carp. |
| Sling designed for carrying fish | Prepare it near the landing spot. Check the material, handles, and closures. |
| Scale and appropriate holder or stand | If you plan to weigh the fish, prepare the entire set and tare the scale with a wet, drained sling. |
| Phone or camera | Set the frame and method of triggering photos before taking the fish out of the water. |
| Lighting | After dark, ensure visibility at the mat and on the path to the water. |
I usually keep the wound care product in a small pocket of the mat, and place the scale with the holder nearby. The sling waits close to the landing net because I need it already when carrying the fish ashore. Every item has its place — I especially appreciate this during solo sessions.
After handling the carp, refill the water and put away the accessories. Preparation before fishing starts is not enough for the entire session.
When fishing alone or after dark
Solo photographing requires prior equipment setup. I use a phone holder attached to the rod rest and a wide-angle lamp. This allows me to prepare the frame and lighting before the fish is on the mat.
Check focus, photo triggering method, and holder stability beforehand. Position the lamp so its base and any cables do not obstruct movement around the fish. Photo lighting does not replace the light needed for walking to and from the water.
If taking a photo requires leaving the carp unattended, take all precautions to prevent the fish from jumping off the mat. This also applies if the phone or camera stops working as planned. Fixing settings should not prolong the fish’s time out of water.
How to prepare the mat surface before placing the fish?
Before every carp, check three things: cleanliness, temperature, and moisture of the surface. A mat laid out in the morning may be dry, heated, or dirty with sand a few hours later.
Remove grains of sand, twigs, and other debris from the area where the fish will lie. Also inspect the inside of the sling. Wet material with stuck sand can still cause abrasions.
Next, check the surface temperature with your hand. If the mat has warmed in the sun, cool it with water from the fishing spot and check again. Pouring a small amount of water on a part of the mat may not be enough.
Moisten the entire surface that will contact the carp, including the inner parts of the sides. Wet your hands before touching the fish.
Also monitor the water in the bucket
On hot days, I change the water, especially if I cannot place the bucket in the shade. I want the water used to wet the fish to have a temperature close to that of the fishing spot.
Check the water along with the mat. A bucket filled several hours earlier and left in full sun may need refilling.
I have seen fish that started moving violently almost immediately after being placed on a dry, heated mat. Such a situation quickly makes controlling the carp difficult and increases the risk of it escaping off the mat. However, not every restless movement has the same cause — the surface must also be prepared for a fish that behaves calmly in the landing net.
Rain does not exempt you from checking. The material may be wet but dirty, and a part shielded by a flap may remain dry.
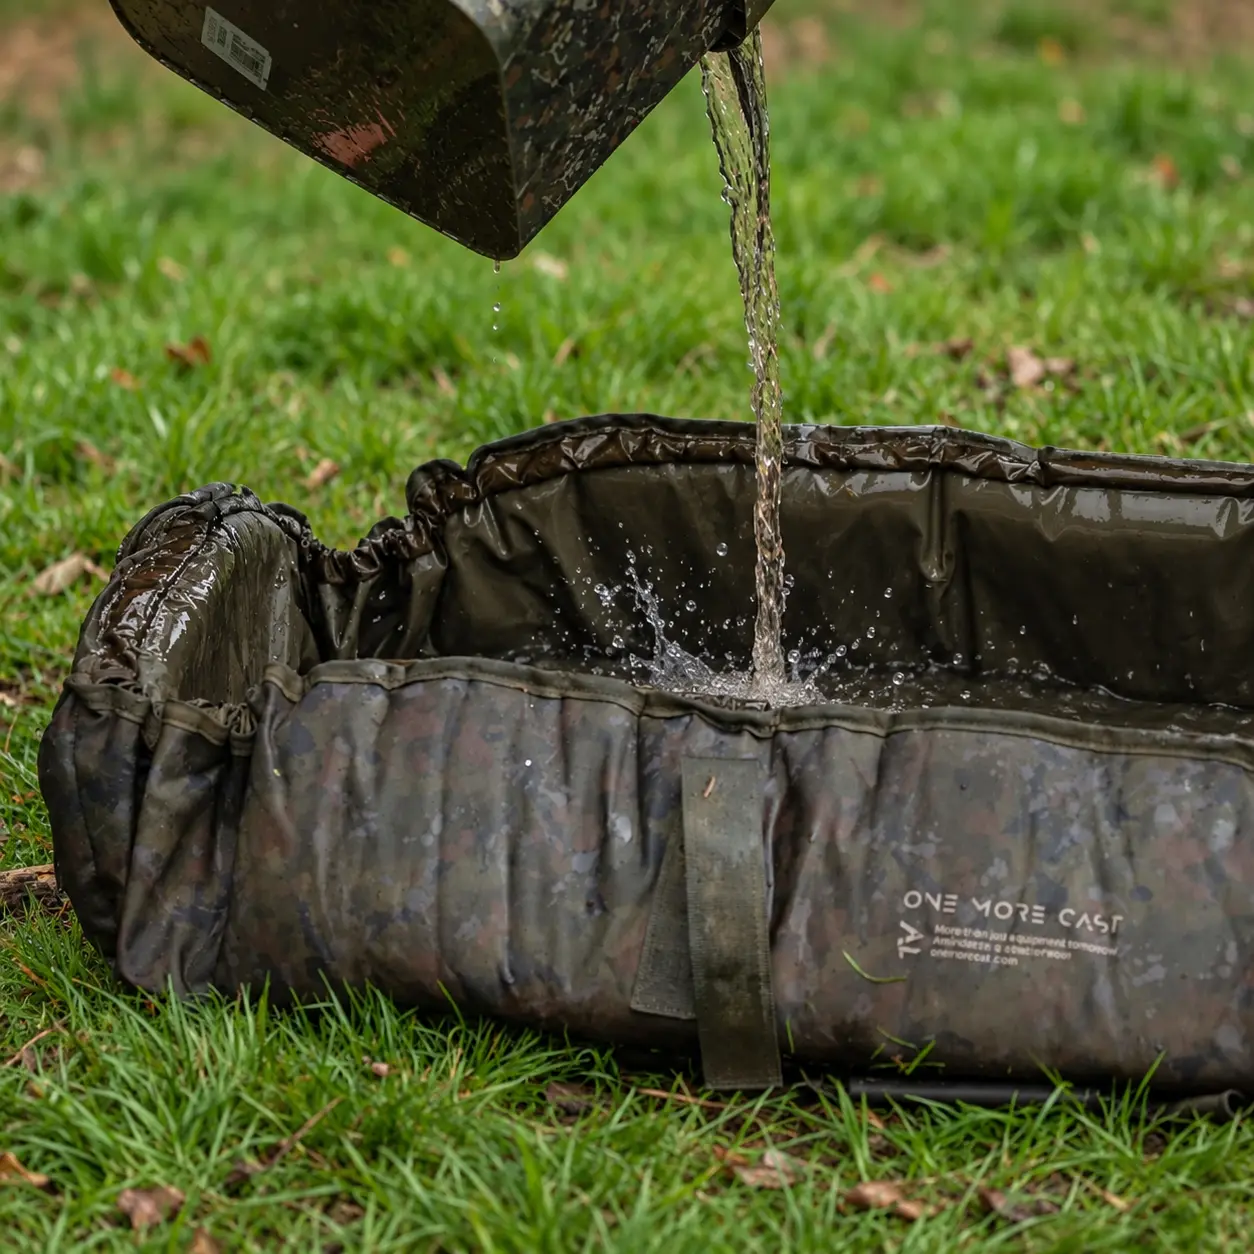
Before placing the carp, check the mat’s cleanliness and temperature, then moisten the entire surface contacting the fish with water from the fishing spot.
How to carry the carp from the water to the mat?
Plan the transfer before taking the fish out of the water. A wet carp is hard to hold, so do not carry it to the mat with bare hands or pressed against your clothing.
Use equipment designed by the manufacturer for this purpose. Proper carp slings provide body support during the transfer between water and mat. The mere presence of handles or floats does not guarantee that a product is suitable for carrying fish.
For large carp, I use the sling already during transport to the mat. I also prepare it for carrying the fish back to the water.
Before lifting, check:
- that the entire fish body is inside and supported;
- that fins and tail are not folded or pressed;
- that the hook, leader, or net are not caught in a way that could cause jerking;
- that closures and handles are secured according to the equipment instructions;
- that the path to the mat is clear.
If you carry the carp together with the landing net placed in the sling, pay special attention to its arrangement and the position of rigid parts. They must not press on the fish’s body.
Carry calmly, without unnecessary lifting. Upon reaching the mat, first rest the sling on the prepared surface, then open it and access the carp. For heavy fish, arrange help before lifting.
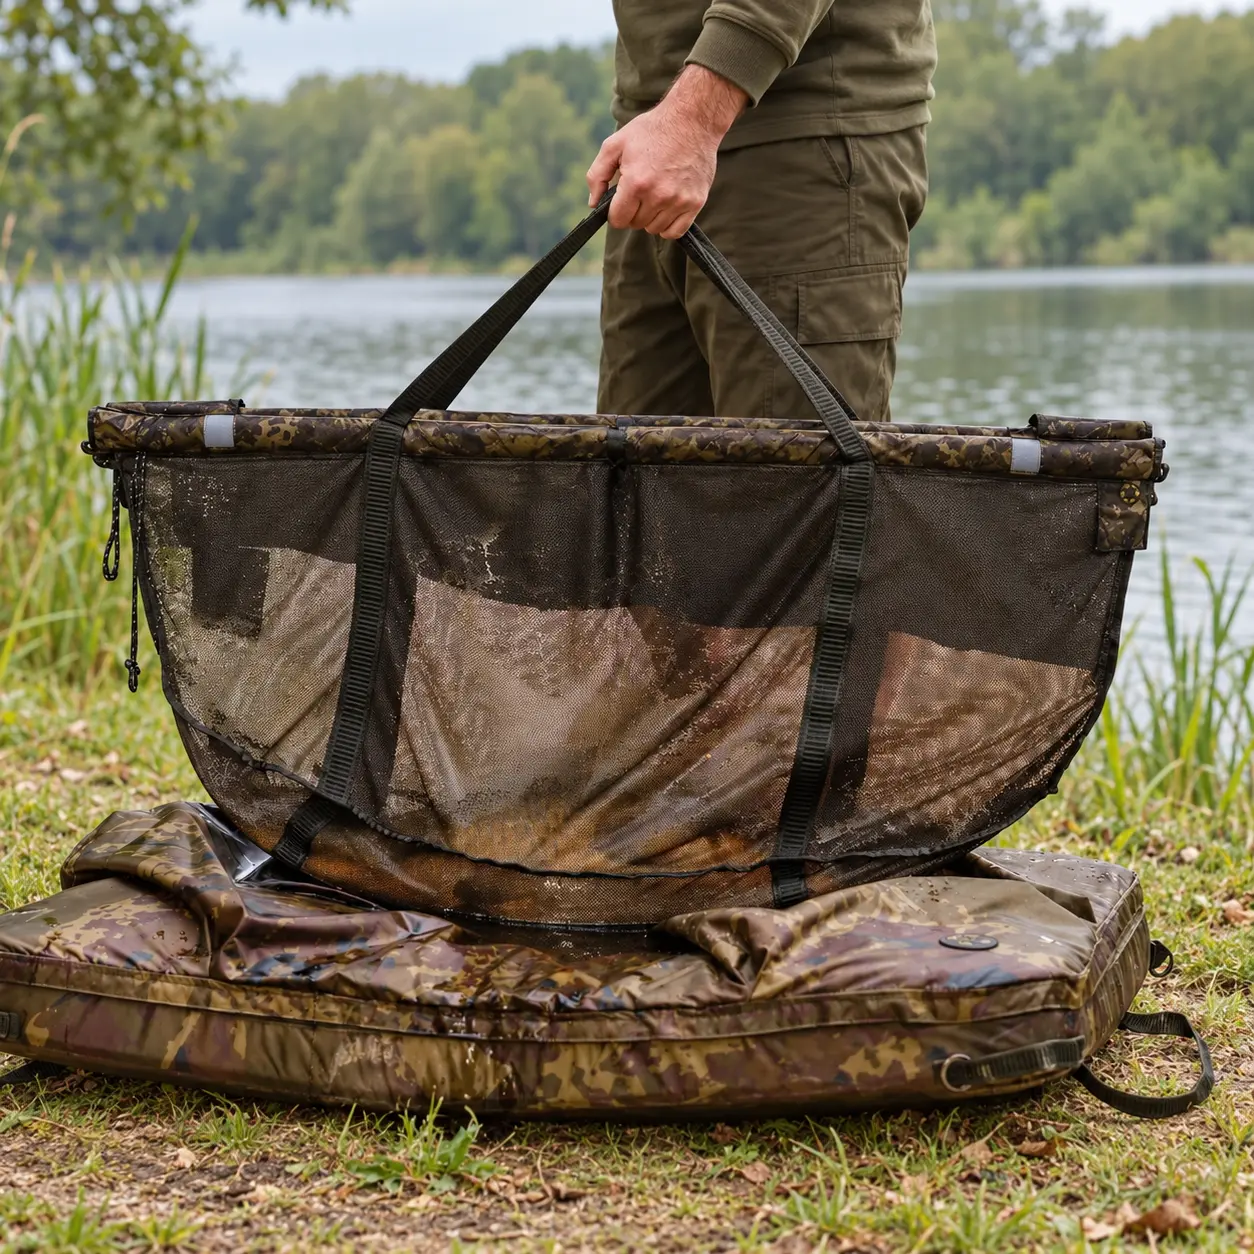
Before lifting the sling, check the fish’s position, fins and tail, and secure the closures. Use a model intended for carrying fish.
How to handle the fish during unhooking?
Kneel steadily by the mat and keep control of the carp’s position at all times. Place tools and rig elements outside the surface where the fish lies.
If the hook has not been safely removed earlier, unhook the carp without jerking. If it is hard to reach, use the prepared tool. Do not prolong handling by forcing repeated attempts.
After removing the hook, put the rig in a safe place. A hook left on the mat can catch the carp’s body, the net, or your hands again.
Pay attention to visible body injuries
Don’t limit your attention to the hook wound. During routine handling, you may notice abrasions, damaged fins, or older wounds.
Fish disinfectants should be used according to the specific product’s purpose, instructions, and fishery rules. A wound care product may not be suitable for all locations and types of injuries. Avoid accidental contact with eyes and gills.
Not every older wound requires reapplication, and the appearance alone is not enough to identify its cause. Report serious or unusual injuries to the fishery manager. The inspection should be efficient — don’t turn it into a long examination at the cost of time out of water.
What to do if the carp starts thrashing?
Stop lifting or photographing and calmly lower the fish onto the prepared mat. Do not try to hold a vigorously moving carp with an increasingly tight grip.
If the fish is already on the mat, monitor its position, especially relative to the open edge. Stay close to it. If the mat has a protective flap designed to shield the fish, you can gently use it according to the product’s design. The flap is not for pressing the carp down and does not allow you to leave the mat.
From my experience, reducing light near the eye sometimes helps calm the fish. However, I don’t treat this as a method that works on every carp. Covering the eye does not mean touching or pressing the eyeball; gently place a moist hand on the fish’s head, slightly covering the eye. If this movement hinders control of the fish, do not attempt it.
Do not turn the carp onto its back in an attempt to calm it. Also, do not press it down with your knee, forearm, or body weight.
If the fish remains very restless, give up on further photo attempts. Efficiently finish the necessary actions and prepare for a safe return to the water.
How to organize weighing and photographing over the mat?
Weighing and photographing are optional. Prepare them in advance, but decide whether to perform them based on the fish’s condition and safe handling possibilities.
Weighing without searching for equipment
Before taking the carp out, prepare the scale and wet sling, let excess water drain, and tare the set. If possible, don’t postpone these tasks until the fish is already on the mat.
Before lifting the sling, check again the position of fins, tail, and closures. Hang the designated weighing points according to the equipment instructions. Lift smoothly over the mat, only to the height needed for reading, then calmly lower the fish.
I usually weigh carp using a handheld grip, and for very large fish, I ask a fishing buddy for help. This method may not be equally convenient for everyone. If the weight makes stable holding difficult, fish weighing stands can be helpful. Prepare and set up a suitable stand firmly before taking the carp out of the water.
Low-position photographing
For the photo, take a stable kneeling position and support the fish with both hands under its body, avoiding the gills and pressure on the belly. Keep the carp low, directly above the mat surface.
Do not stand up with the fish to improve the frame. The photographer or pre-set camera should adjust the shot to the angler’s safe position.
If the carp starts moving, lower it onto the mat. Do not prolong the session with repeated attempts to get the perfect fin or background arrangement.
With two people, assign tasks: one handles the fish, the other operates the camera and hands over equipment. The photographer should adapt the pace to the carp’s behavior rather than encouraging longer holding over the mat.
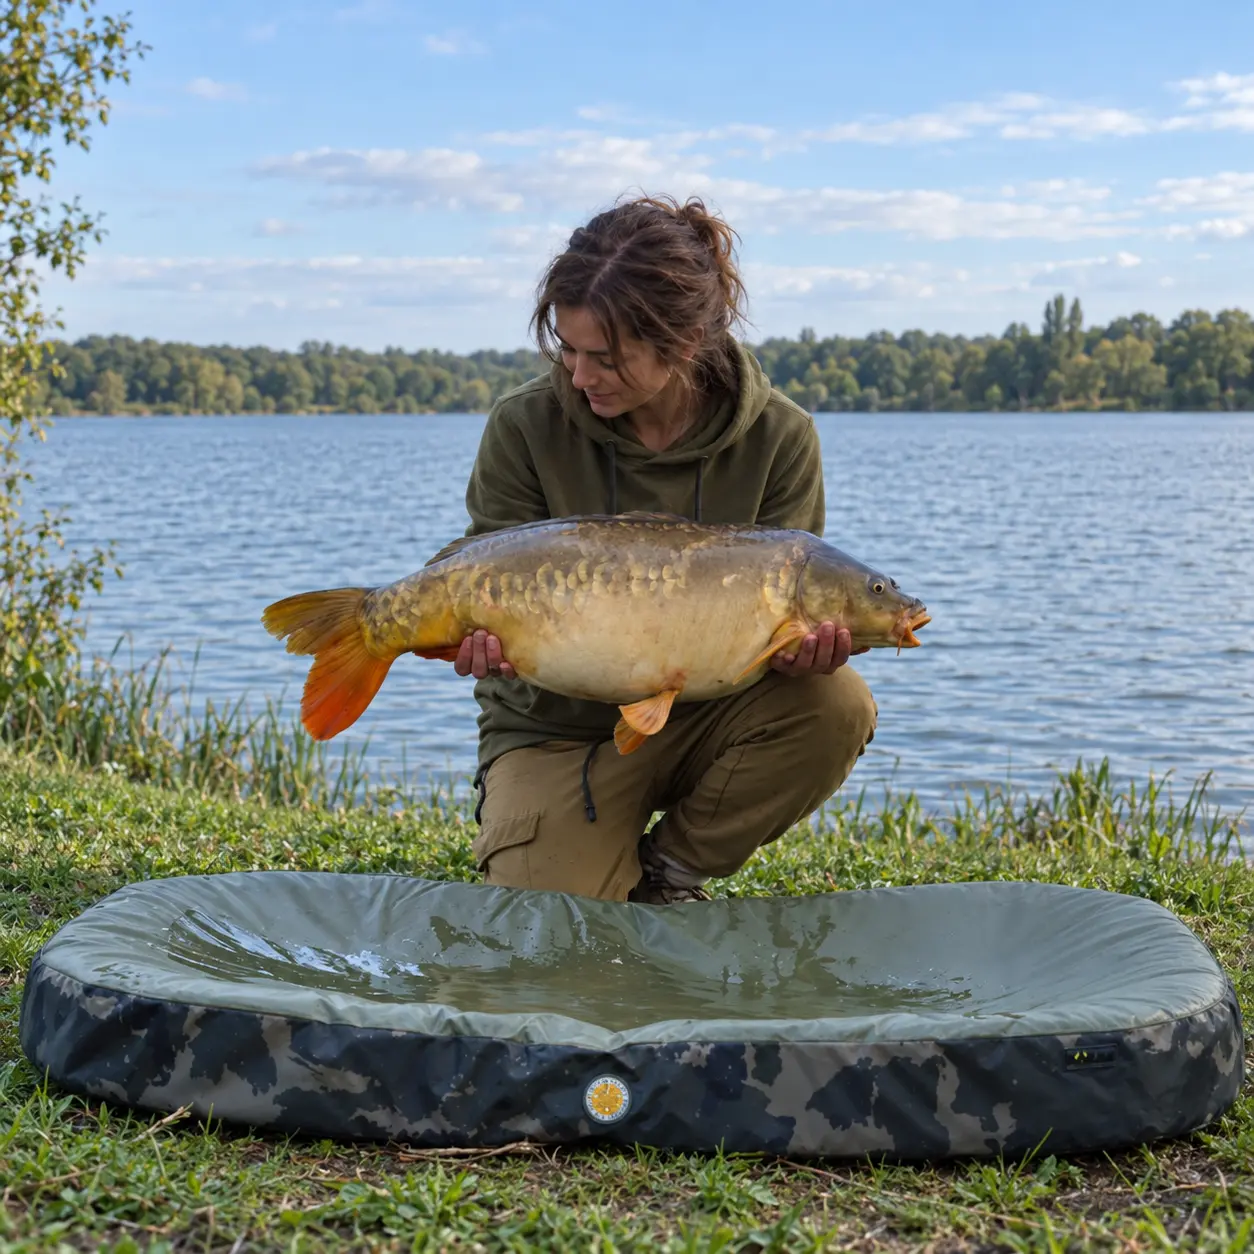
For the photo, kneel and hold the carp low over the mat. If it starts thrashing, stop photographing and calmly lower it onto the mat.
How to safely release the carp?
Prepare the return along the same safe path the fish took to the mat. Place the carp in the sling designed for carrying, check its position, and carry it over the water.
Choose a spot allowing immersion without contact with stones or very shallow bottom. Maintain your own stability — do not descend with a heavy sling on unstable banks.
After immersion, open the sling and allow the fish to regain balance and swim away independently. Do not dump the carp into the water or push it away from the bank. Watch that it maintains a natural position and swims off in a coordinated manner.
During summer sessions, I have seen anglers leave immediately after placing the fish in the water, even though it still needed attention. Simply moving the carp from the mat to the fishing spot does not end your responsibility for its release.
If the fish rolls over or cannot maintain balance, do not leave it unattended. Gently support it in a natural position in the water without pressing the gills. Do not pull the fish back and forth repeatedly.
When conditions at the fishing spot indicate oxygen problems, simply keeping the fish longer in a nearshore sling does not solve the situation.
Common mistakes when using a carp mat
| Mistake | Possible consequence | How to avoid it? |
|---|---|---|
| Placing the carp on a dry or heated mat | Irritations, abrasions, and violent fish movements | Check the surface before every carp, cool it if needed, and moisten thoroughly. |
| Leaving sand or gravel on the mattress | Skin contact with sharp particles despite using the mat | Check and rinse the working surface and the inside of the sling. |
| Preparing the scale or camera only after taking the fish out | Prolonged time out of water and distracted attention | Prepare and check the equipment before taking the fish out of the water. |
| Leaving the fish unattended under the protective flap | Uncontrolled movement or escape from the mat | Stay close to the carp; treat the flap as additional protection. |
| Lifting without checking fins and tail | Pressing or folding parts of the body | Check the fish’s position before every sling lift. |
| Tightening grip on a thrashing fish | Increased risk of injury and loss of hold | Stop photographing and lower the carp onto the mat. |
| Automatically using one product for every wound | Using a product outside its intended purpose | Follow instructions and report serious wounds to the fishery manager. |
| Leaving immediately after release | Missing balance and swimming-off problems | Watch the fish until it swims off independently and in a coordinated way. |
After returning to your spot, rinse debris from the working surface, check the sling, refill the bucket with water, and put accessories back in place. The mat should be ready again before the next bite. Thorough cleaning, drying, and storing of the gear after the session is a separate, equally important care step.