Our website uses cookies that help provide you with safe and comfortable conditions during your visits. The site uses cookies to ensure proper functionality, analyze traffic, and display personalized ads through partners such as Google, Meta, TikTok, and Microsoft. Thanks to cookies, we can understand your needs and tailor ad content to your interests.
You can accept all cookies, but it is not necessary to use the site. You can customize your consents according to your preferences – the decision is yours. Consents can be changed at any time.
Detailed information about cookies can be found in our Privacy Policy.
Always active
» User Privacy
Our website uses cookies to ensure you have a safe and comfortable experience while visiting our site. They also help us understand your needs, including tailoring ad content to your interests. More information
Always active
» Technical cookies
It is thanks to them that our website functions properly. Technical cookies are essential for our website to operate correctly. They are used to ensure your security, maintain the session, and display the website appropriately.
» Analytical cookies
It is thanks to them that we tailor the website to your needs! Analytical cookies help us understand how you behave on our site, including remembering your preferences, individual settings, and choices. Based on this, we know how to improve our website and expand our offer.
» Marketing cookies
It\'s thanks to them that you receive personalized ads! We use marketing cookies to select and display product ads that may be useful to you. These ads are shown both on our website and on our Partners\' websites based on your behavior on our site.
ATTENTION! left:
The FREE SHIPPING campaign is ongoing. Remember to take advantage of the promotion by Logging in! You can find the terms of the promotion by clicking here >> Free Shipping! <<
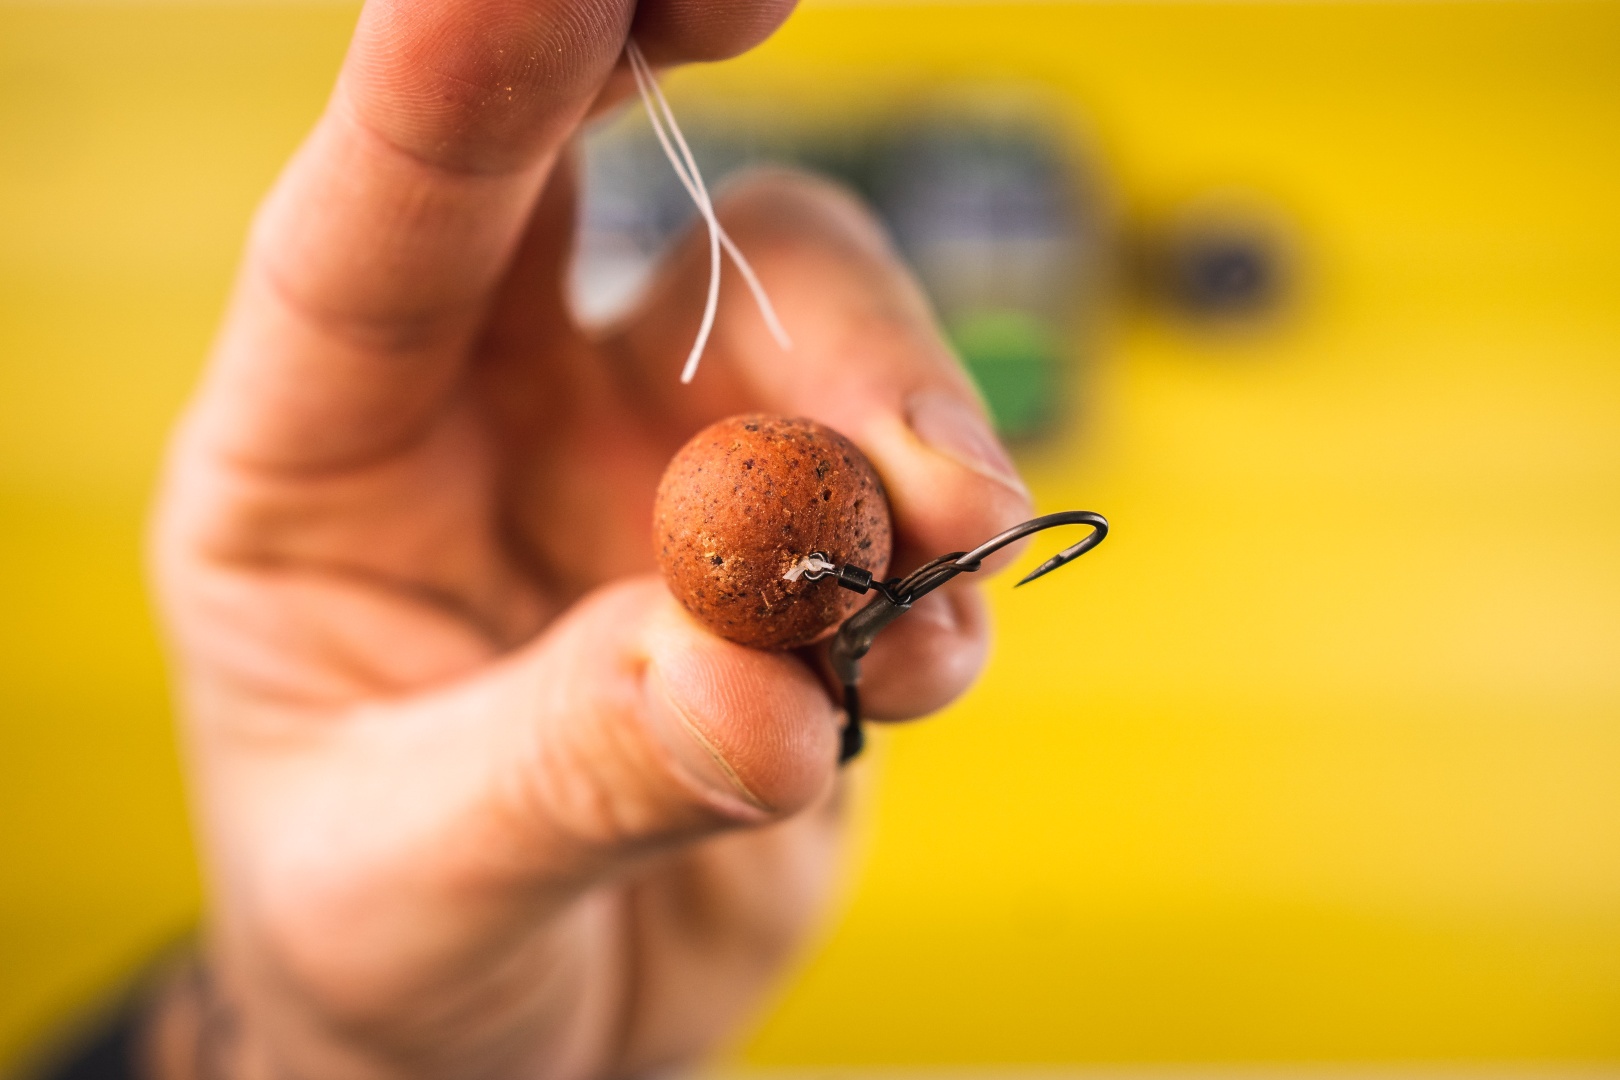
SLIP D-Rig - The Versatile and Effective Rig by Rafał Bartkowiak
The topic of constructing a rig that can be considered by carp anglers across the globe as one of the most universal and versatile, yet devilishly effective, has been a subject of debate for decades!
For me, that rig has always been the Blow-Back Rig, which has become almost legendary! Why? Because it has been and remains effective in most situations we encounter by the water, and it can harmonize with virtually any bait that hangs on its hair! From sinking boilies, through balanced wafters, to grains and "snowmen". Could we want anything more? Always!
Several years ago, I decided to try a completely different type of rig construction, which functions very similarly to the previously mentioned Blow-Back Rig and most importantly – it is just as effective. I can even dare to say that in my opinion, it is a worthy successor! Without keeping you in suspense any longer, I will try to illustrate and describe in a few steps how to easily make the mentioned rig. I present to you: the Slip D-Rig!
You can make a Slip in two ways: using the traditional "knotless knot" or using a loop. The latter option allows you to change the hook at any time, for example when it becomes dull, without the need to discard the entire rig! Personally, I am a fan of the loop version and it is the one that will be described in the following steps.
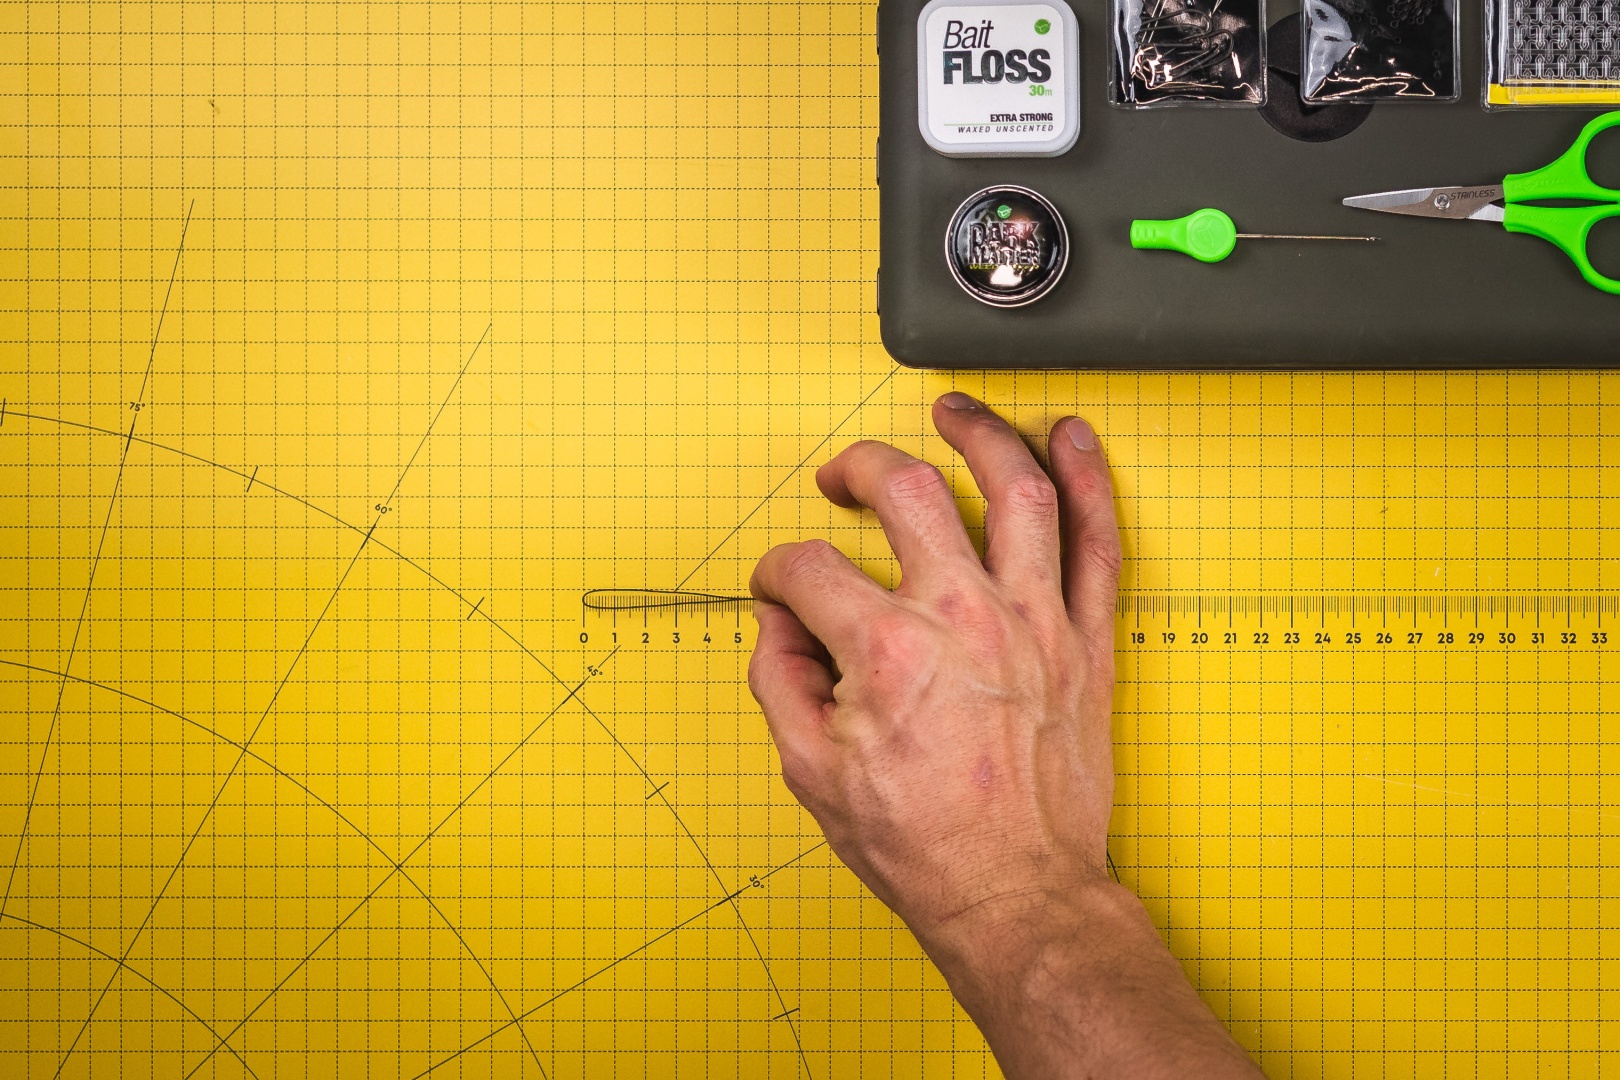
1 Prepare your leader braid. In most cases, I use a soft coated braid.
2 Measure the appropriate length and then cut it. I adjust the length of the leader to the conditions and the bottom where I am fishing.
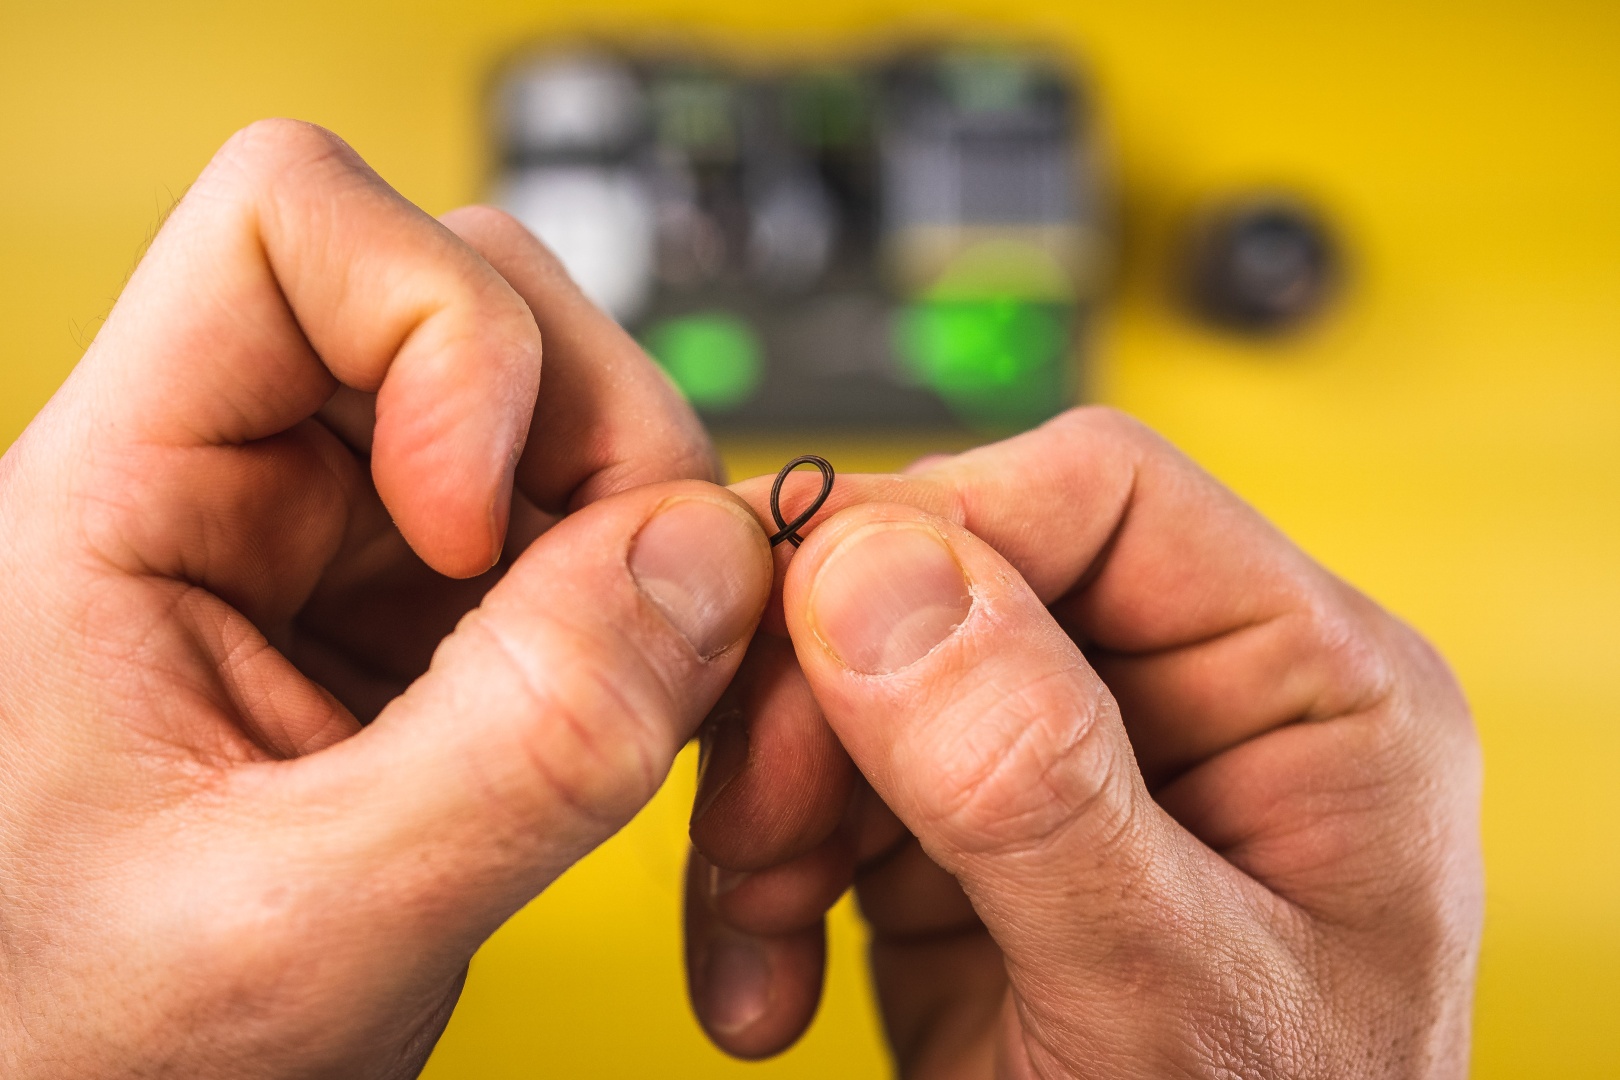
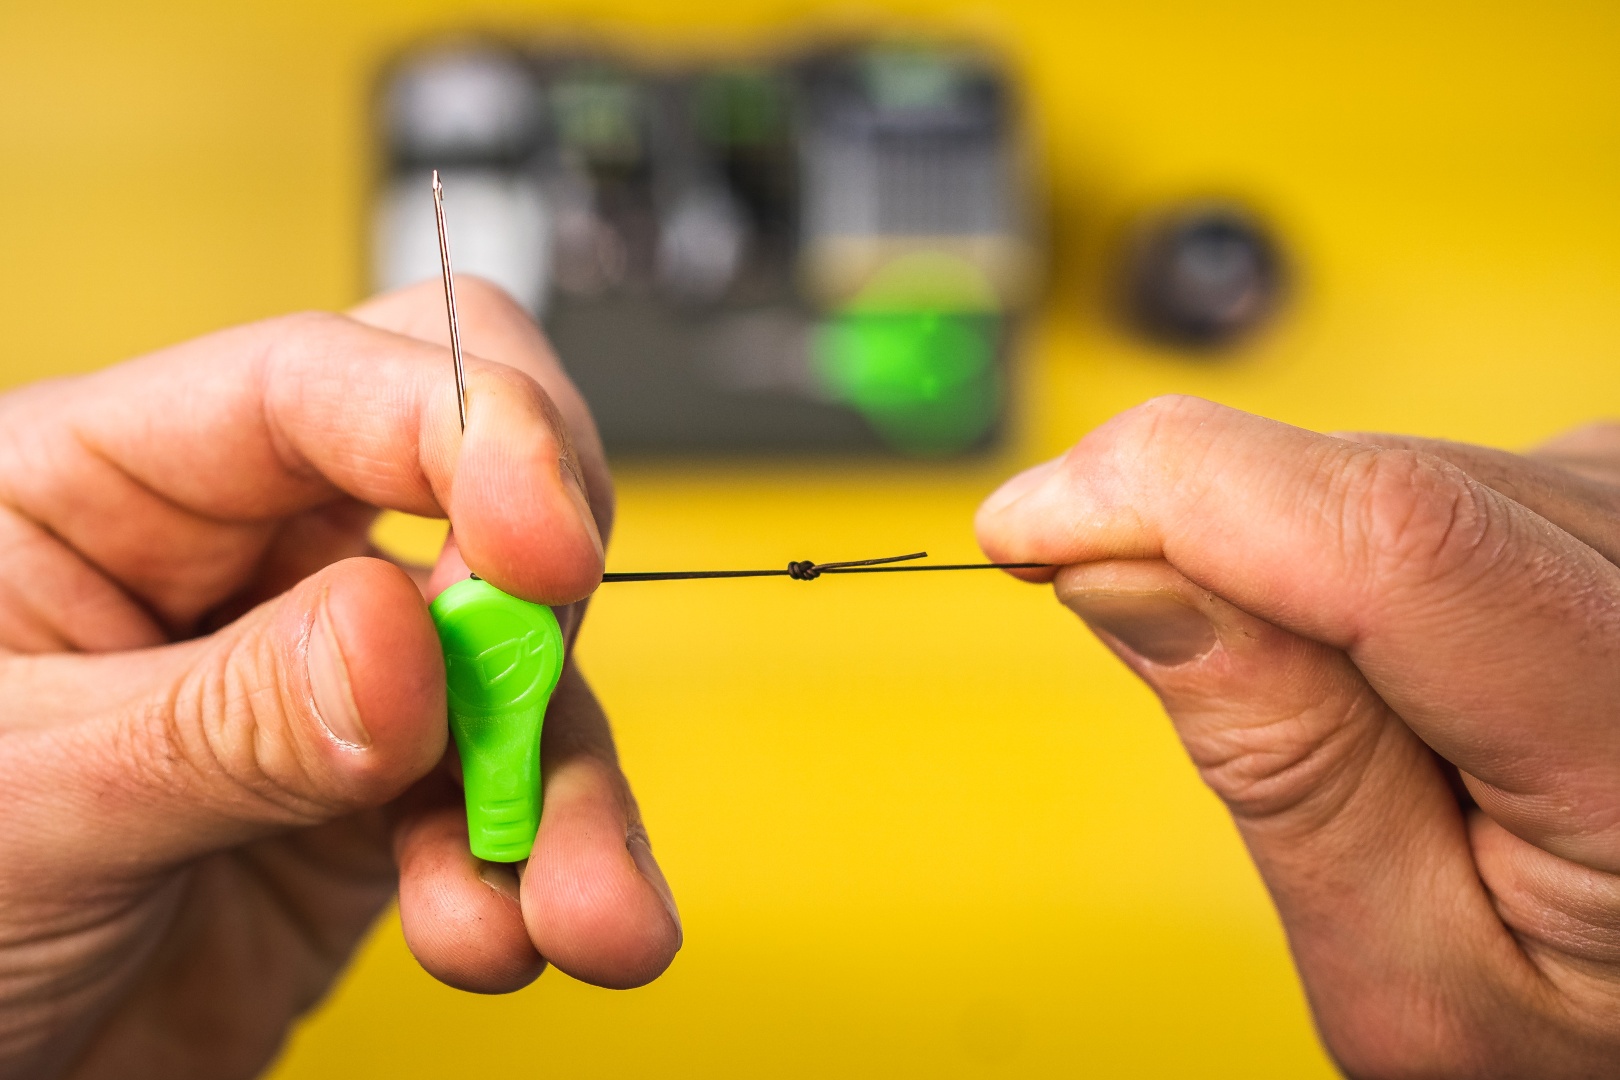
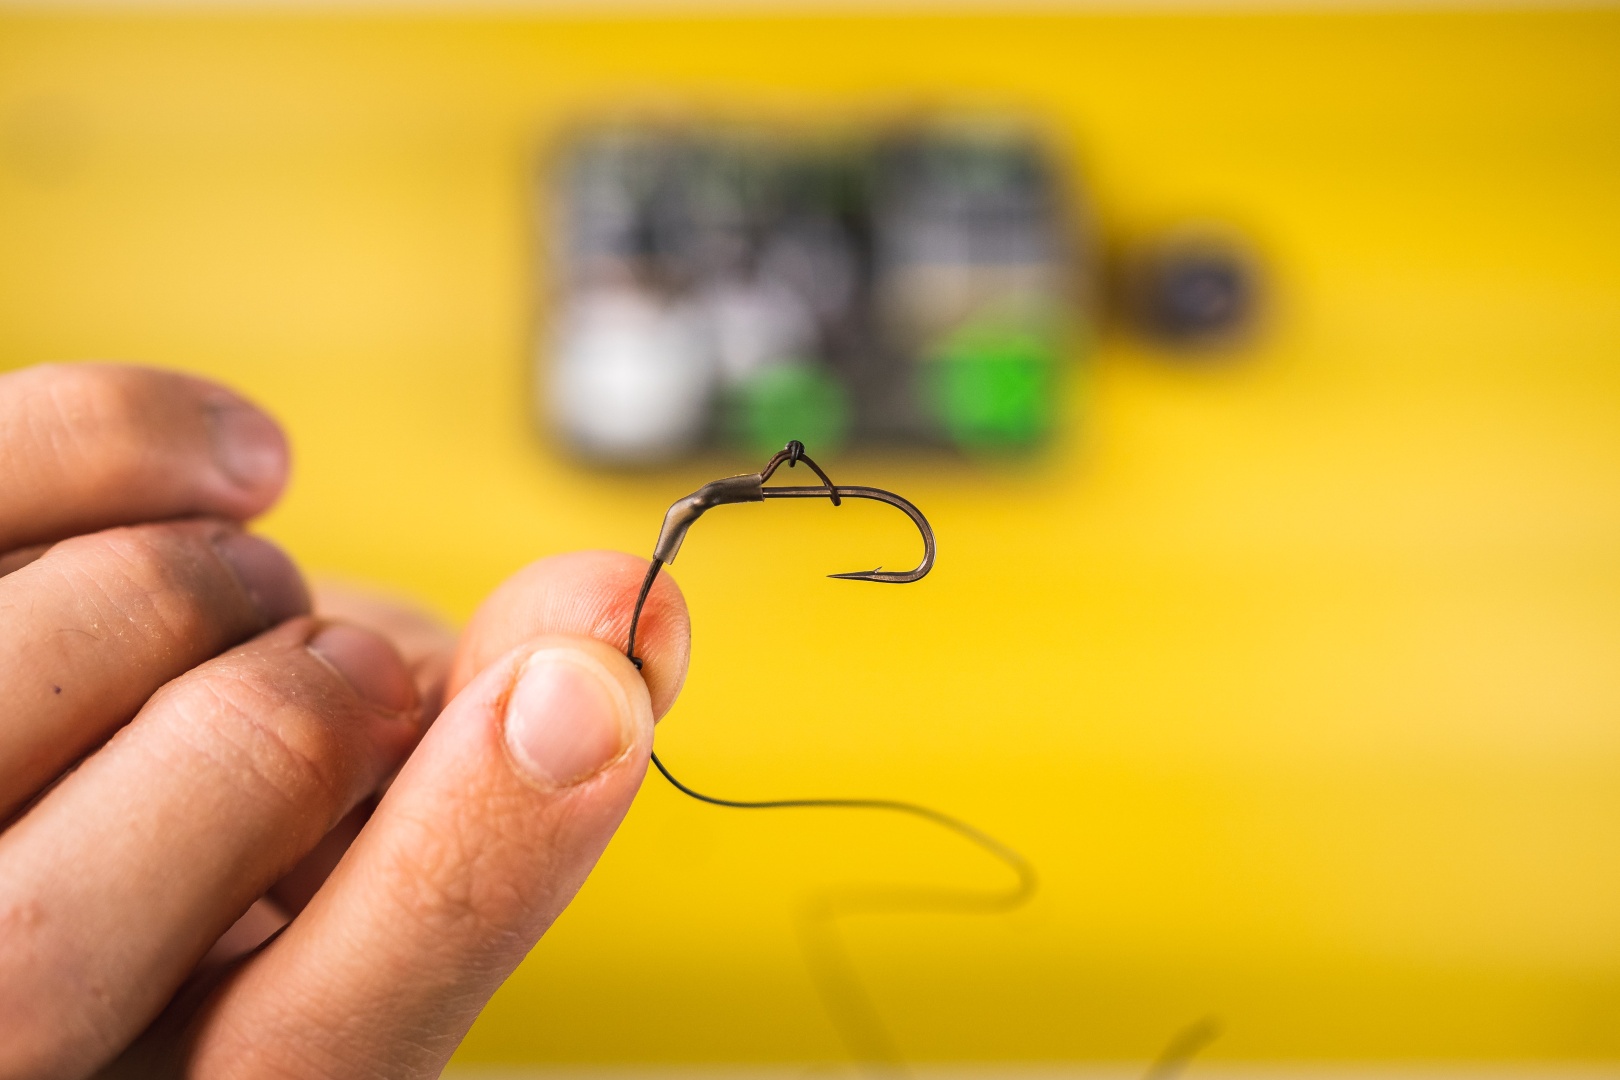
3 Tie a loop of a length that is suitable for the size of the hook. In my case, I will be using a size 6 hook, and the loop will be approximately 5cm in length when "stretched out".
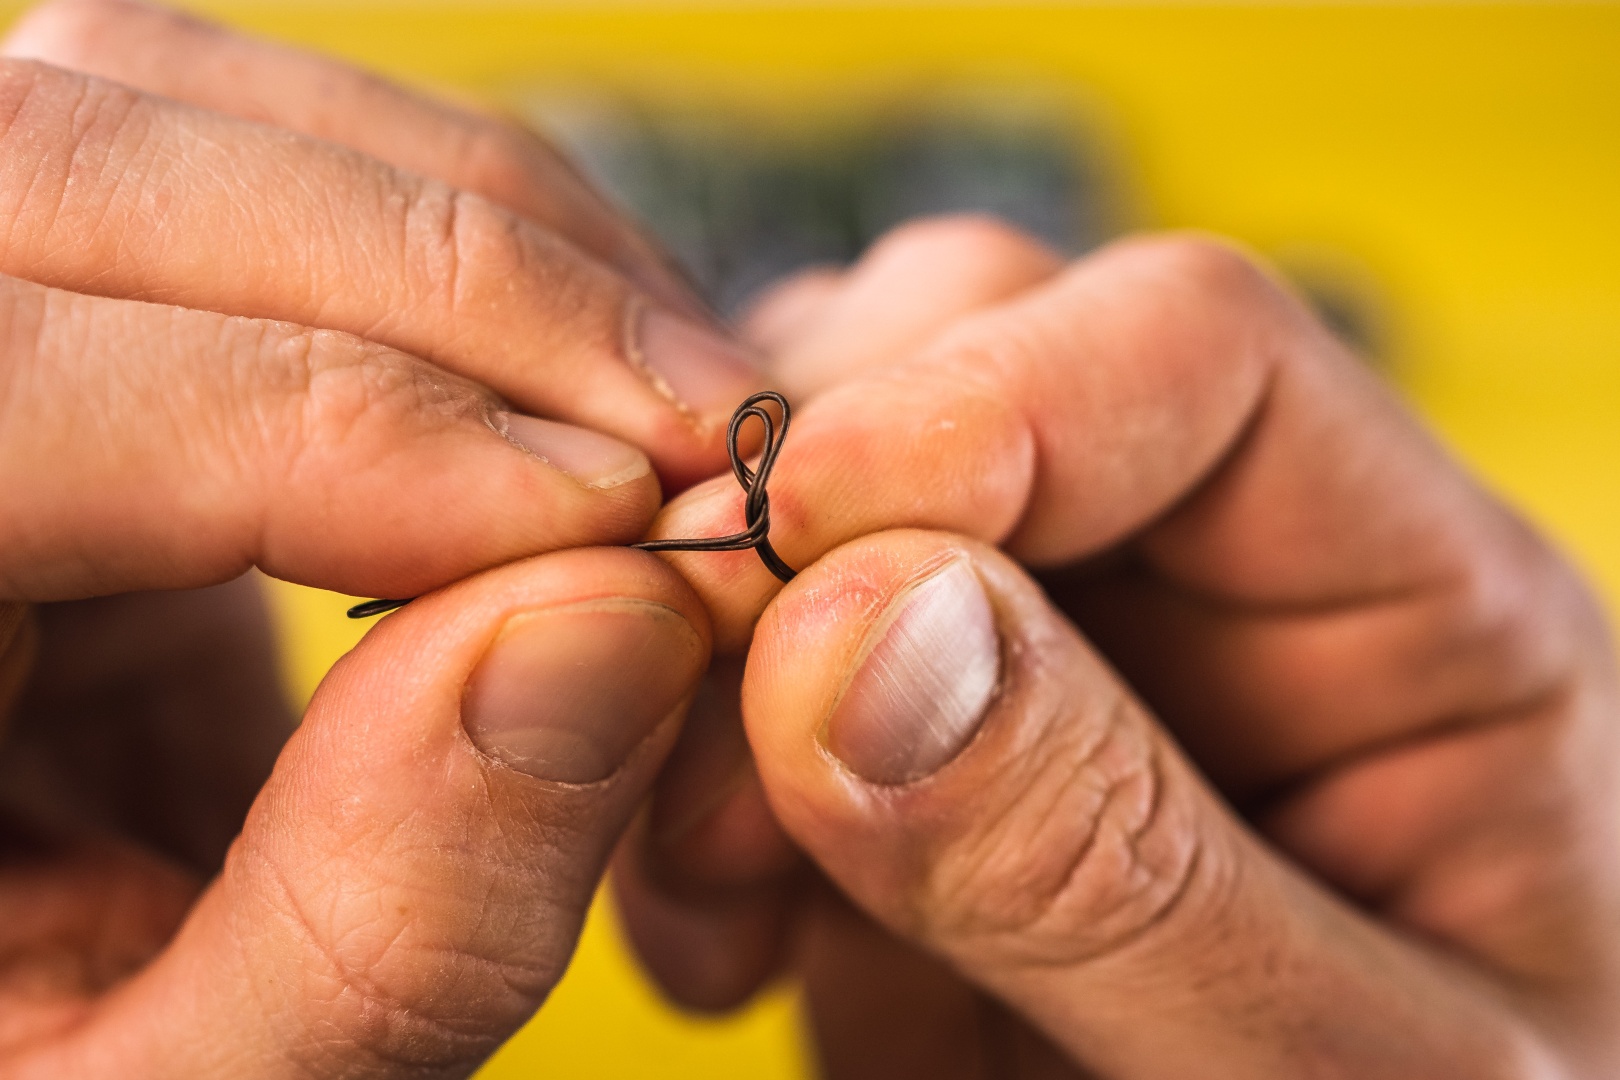
4 Tie the loop using the classic "figure-eight" knot.
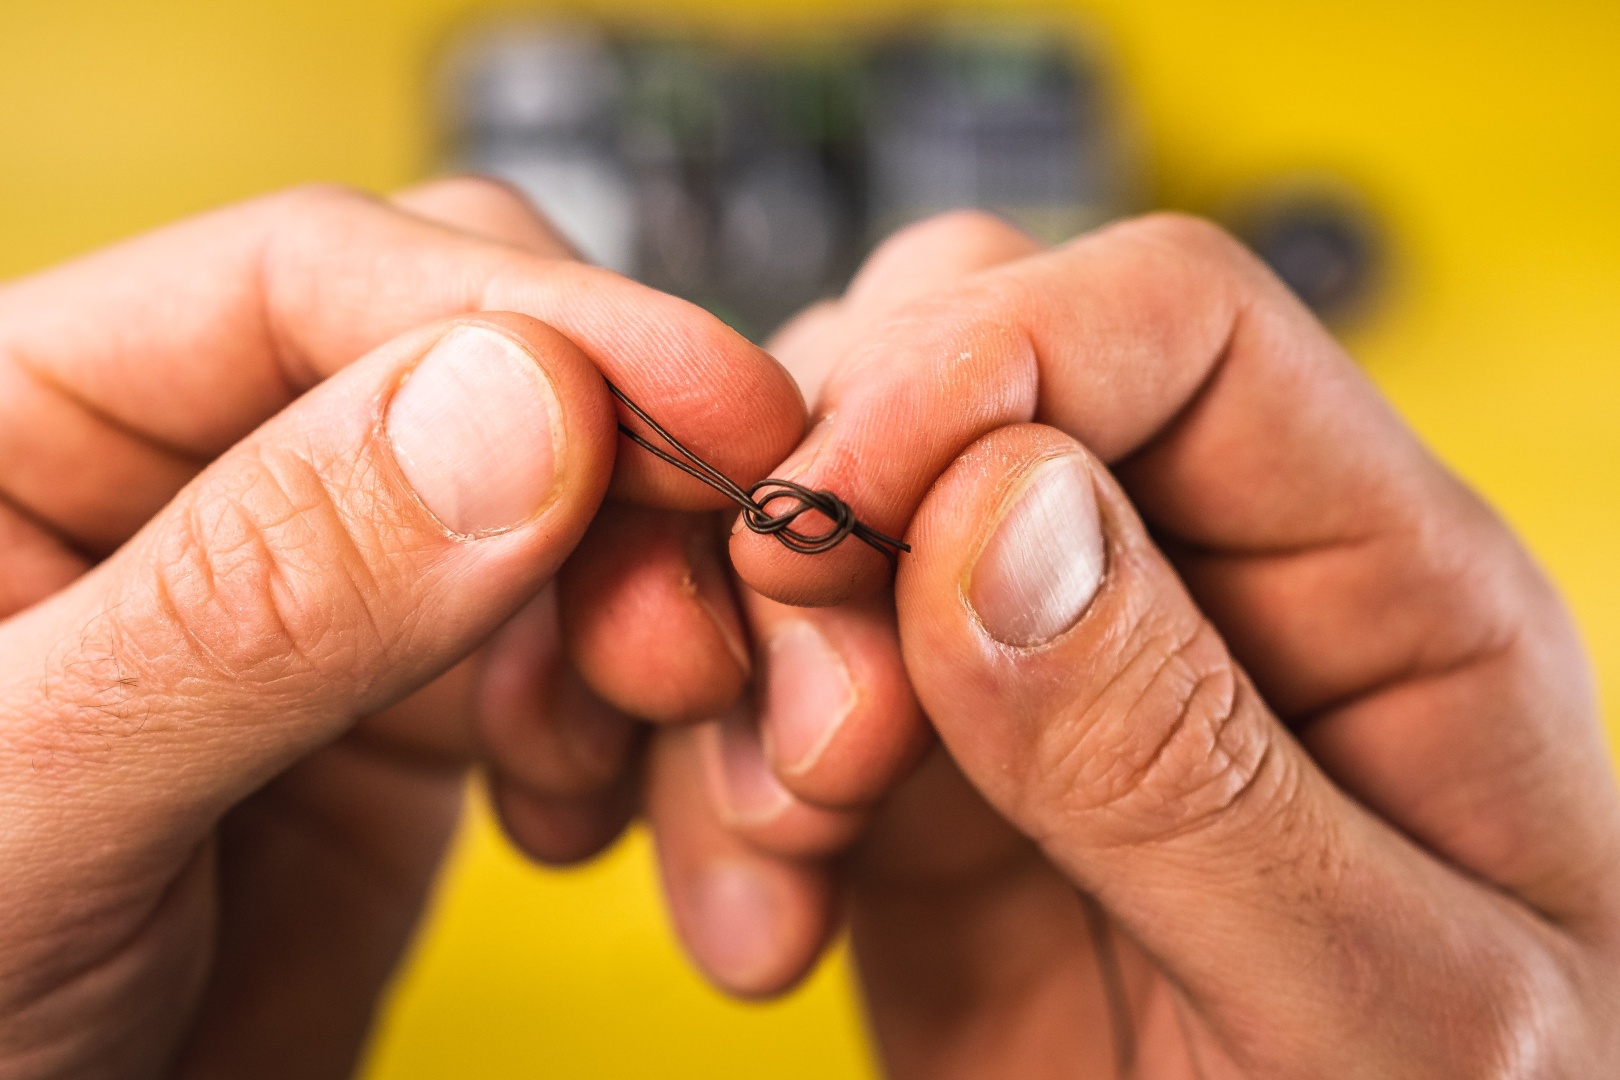
5 Tighten the knot you have created.
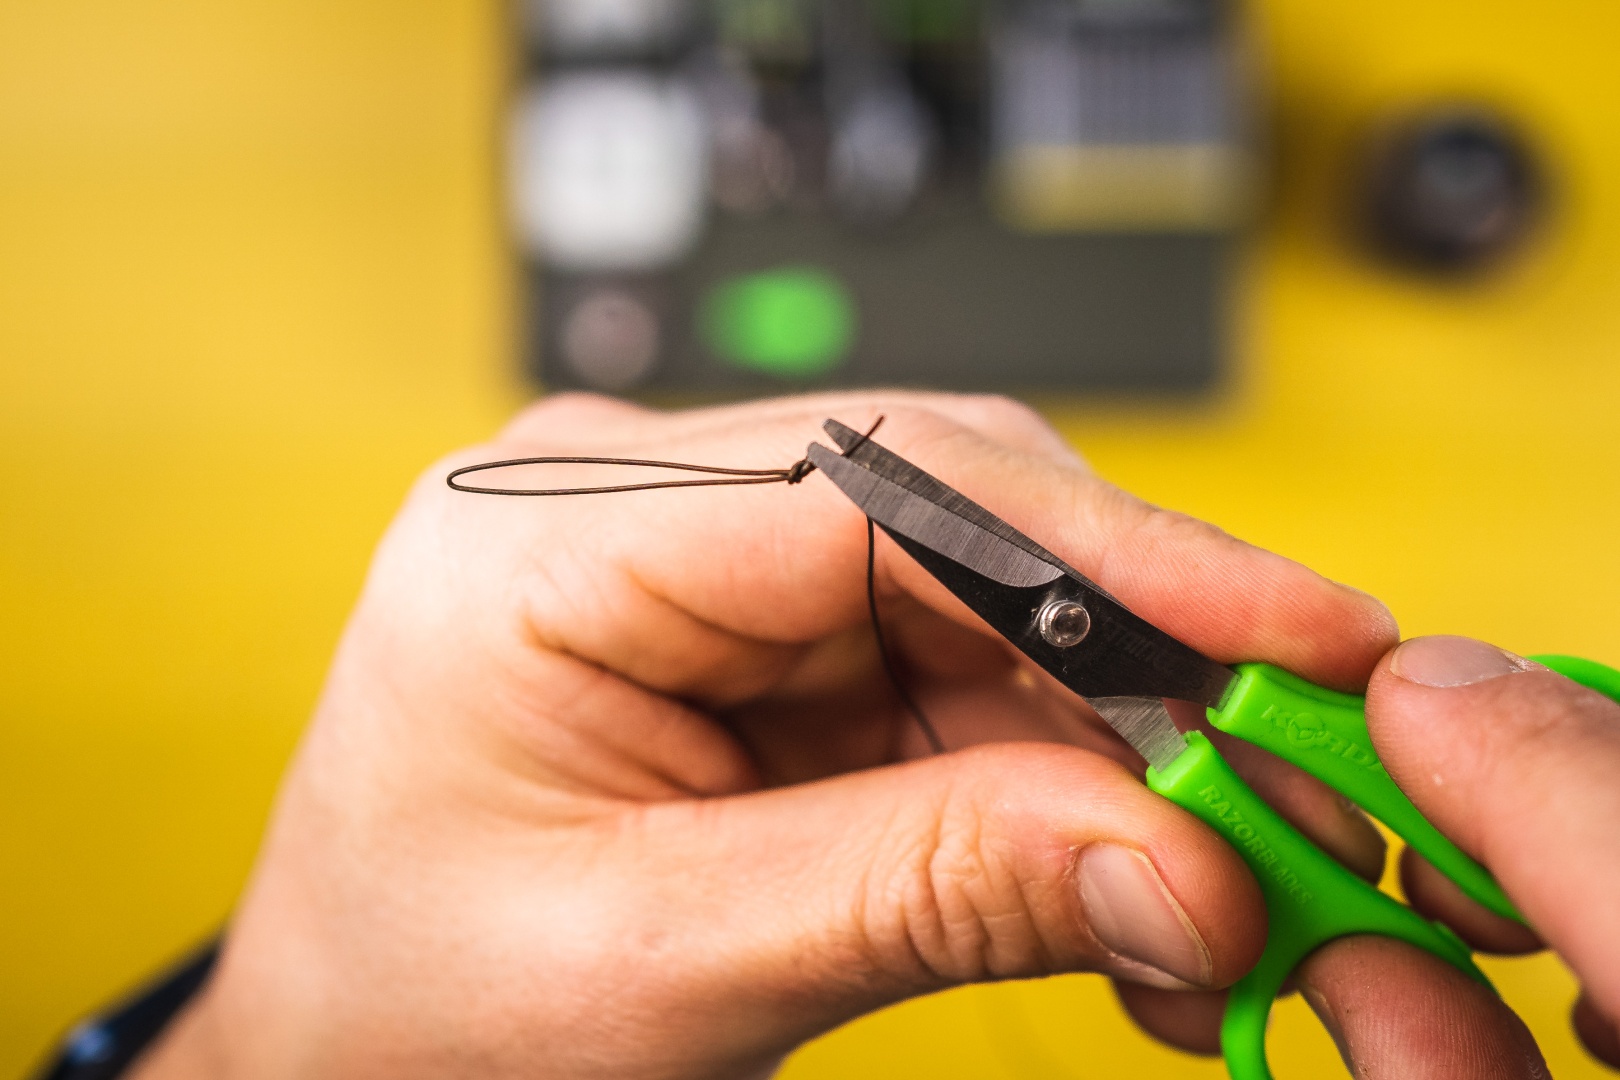
6 Trim excess braid.
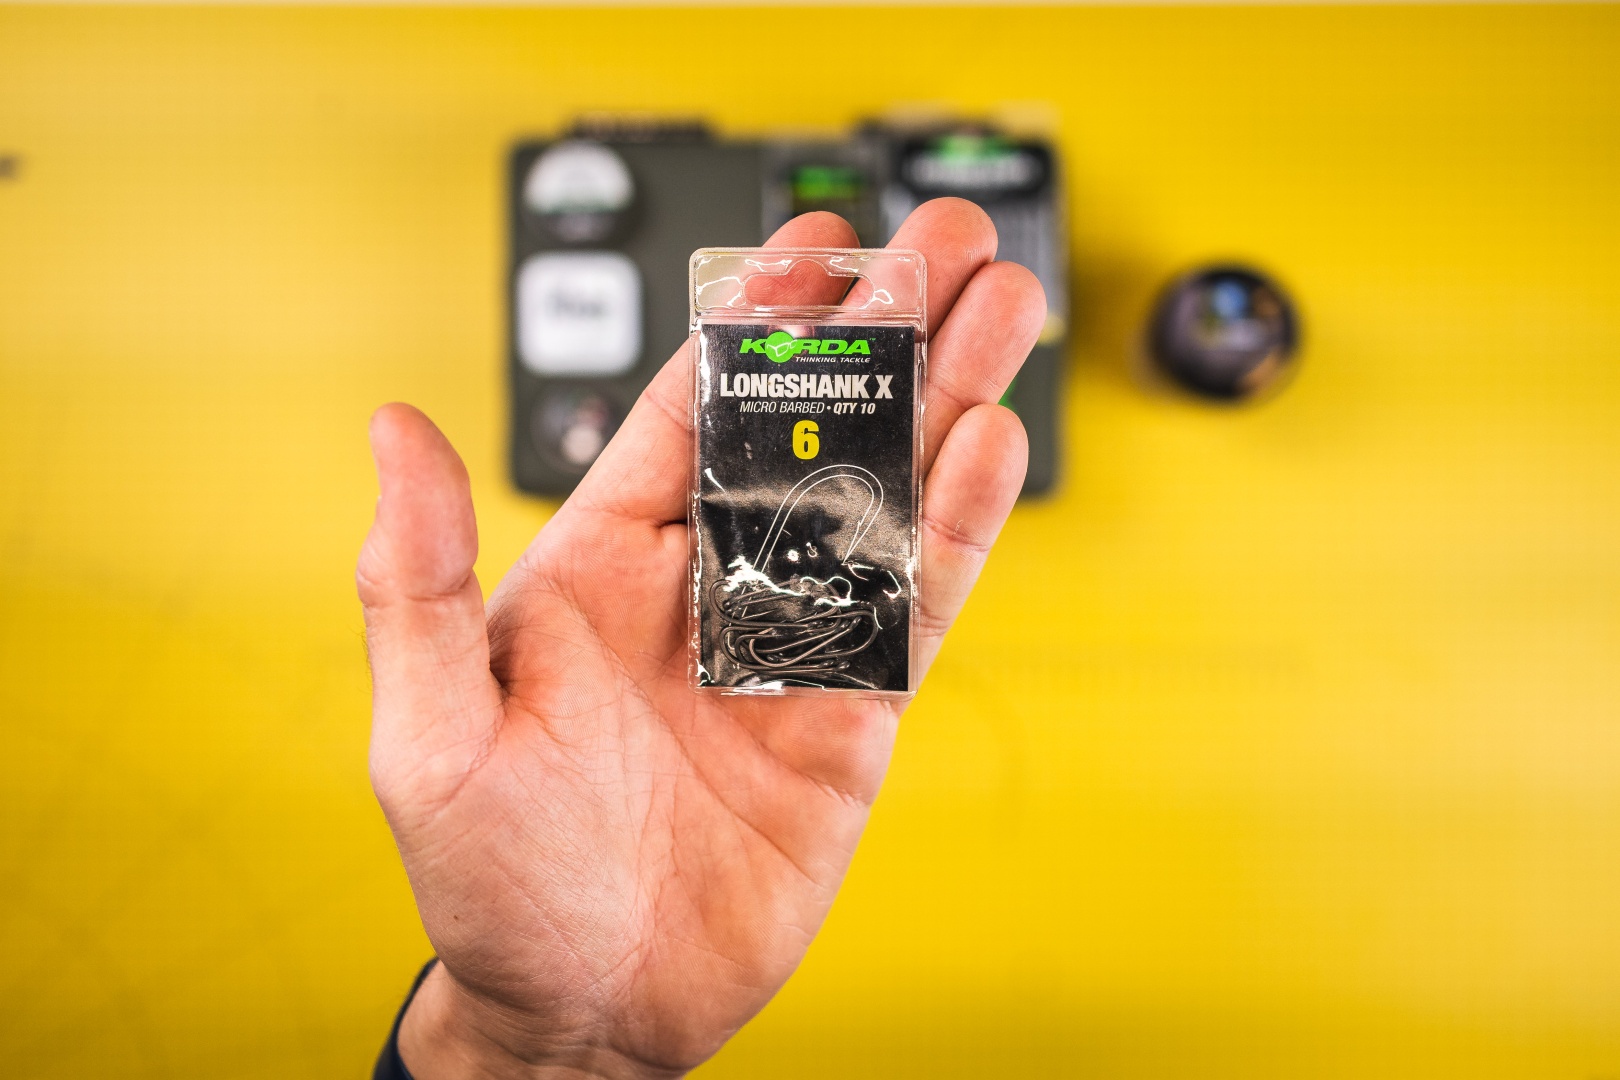
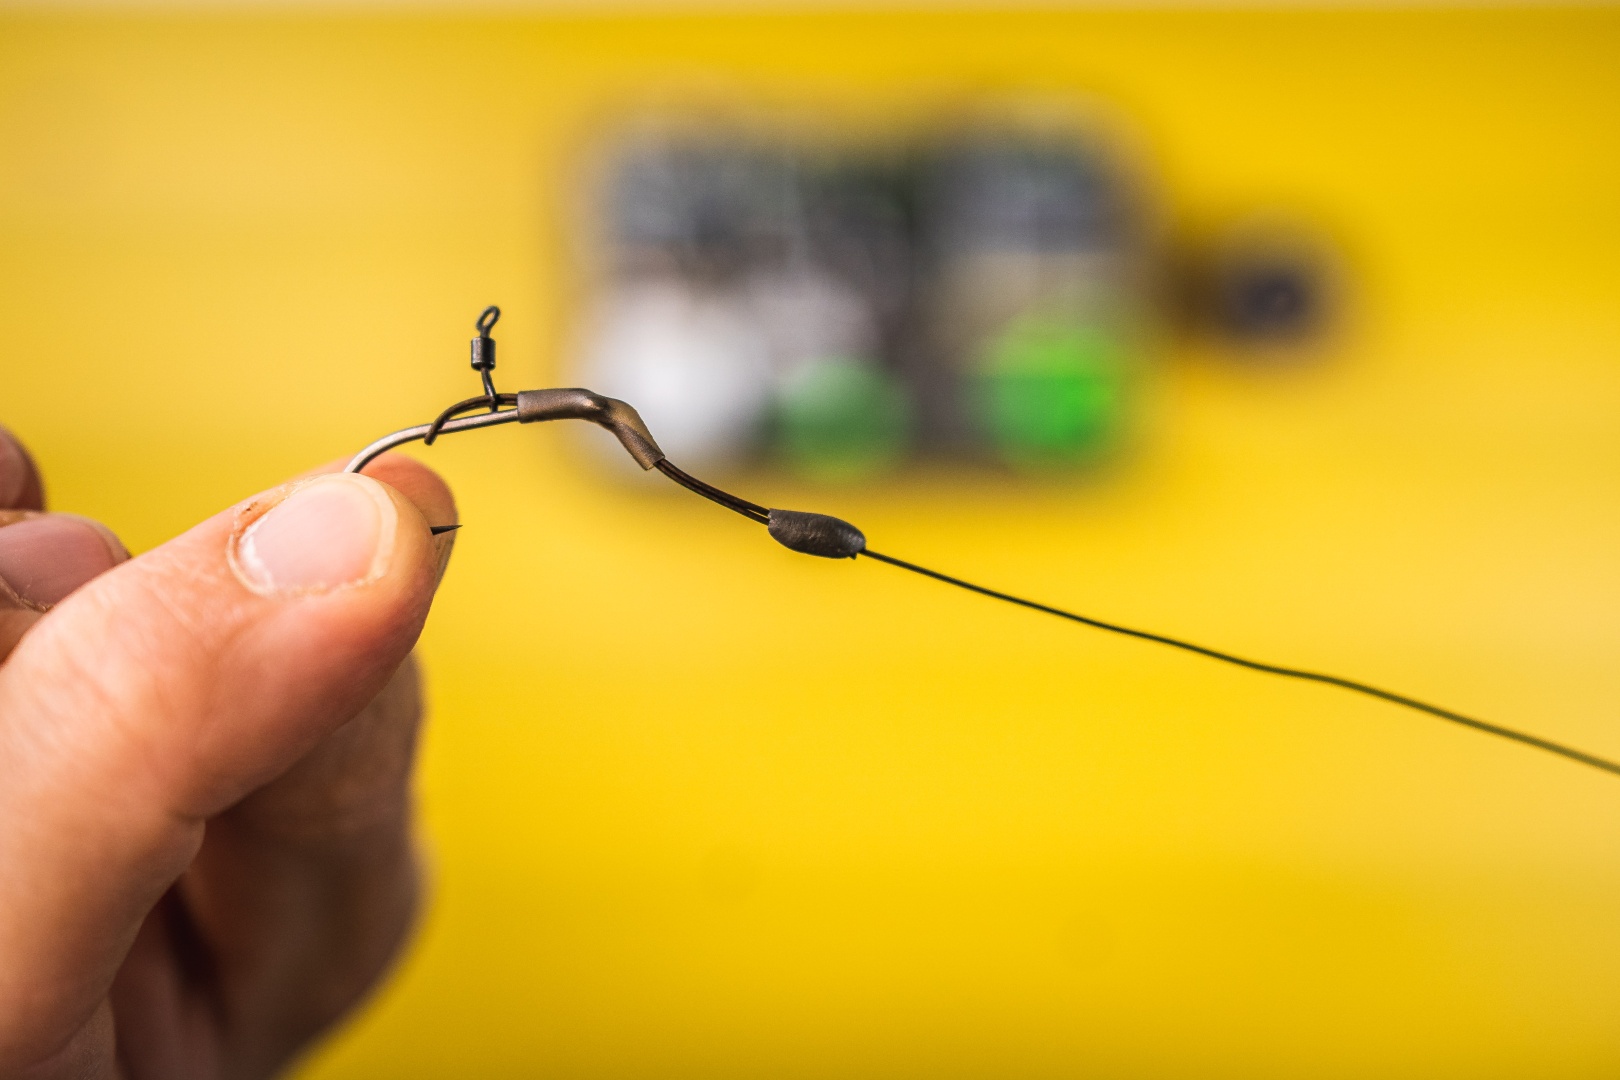
7 Prepare the hook. For constructing the Slip rig, I use Long Shank hooks, which feature a characteristic elongated shank. This is a very important element for me, as it helps maintain the correct function of the leader when the bait is being sucked in and during the carp's attempt to expel it.
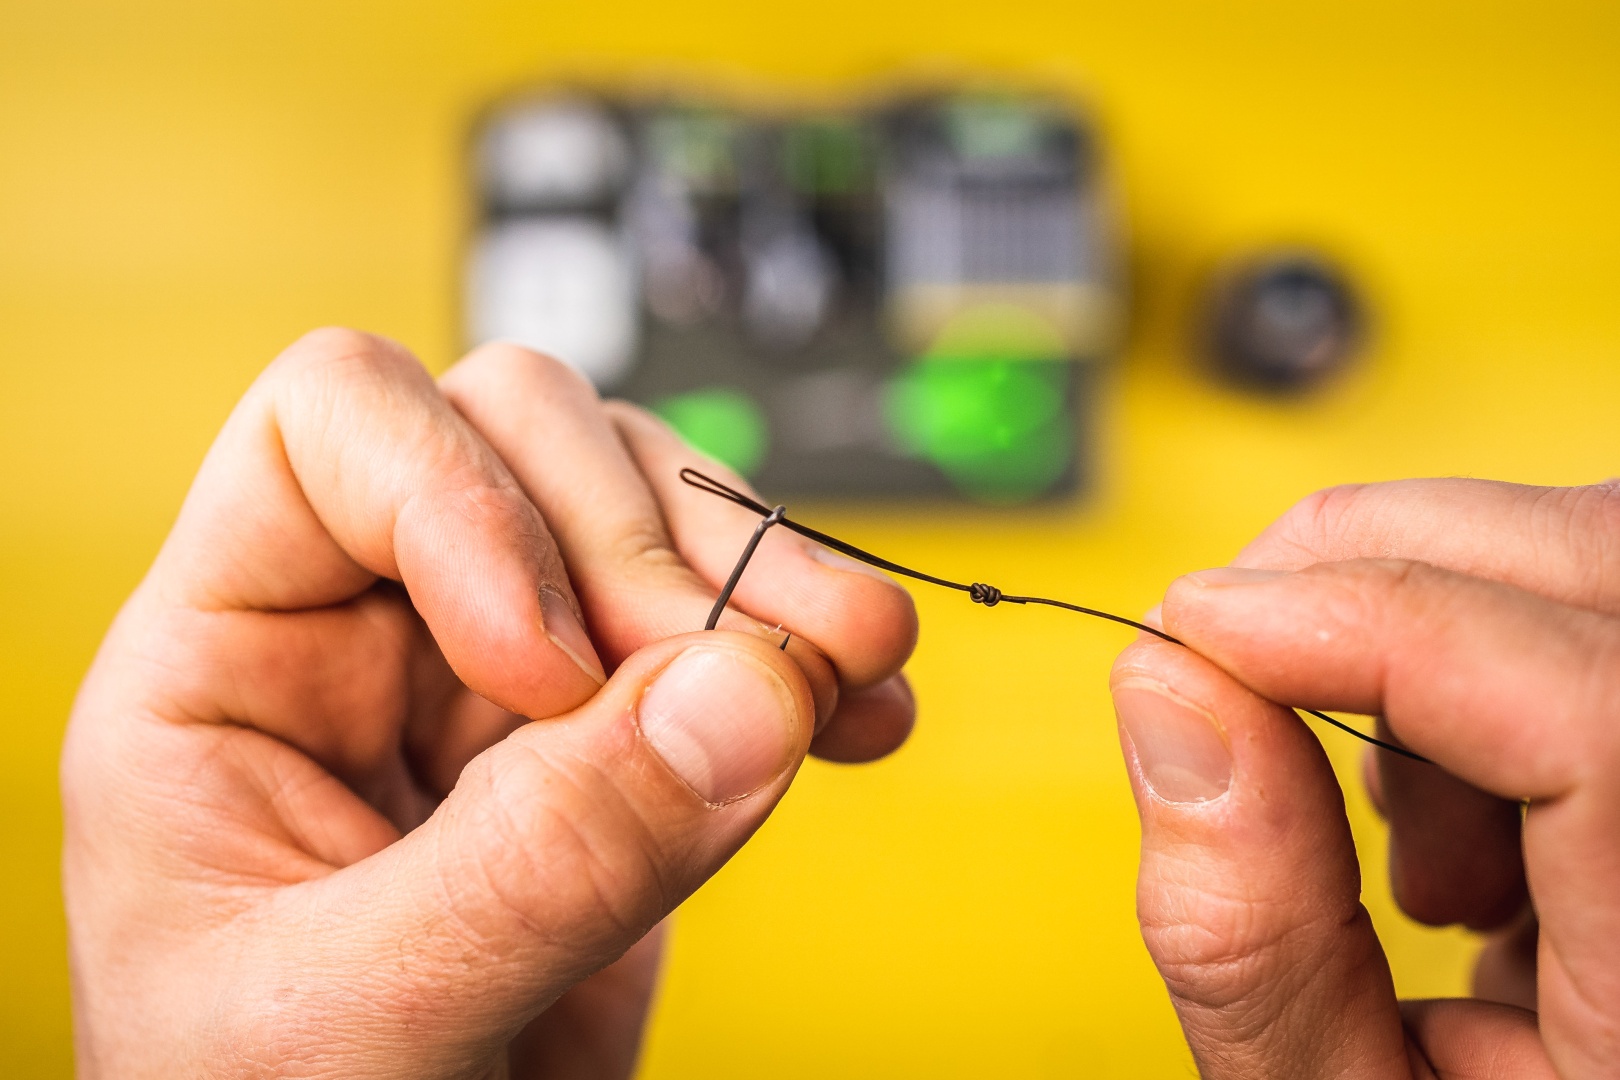
8 Thread the previously tied large loop through the eye of the hook from its inner side – do not remove the coating on this section!
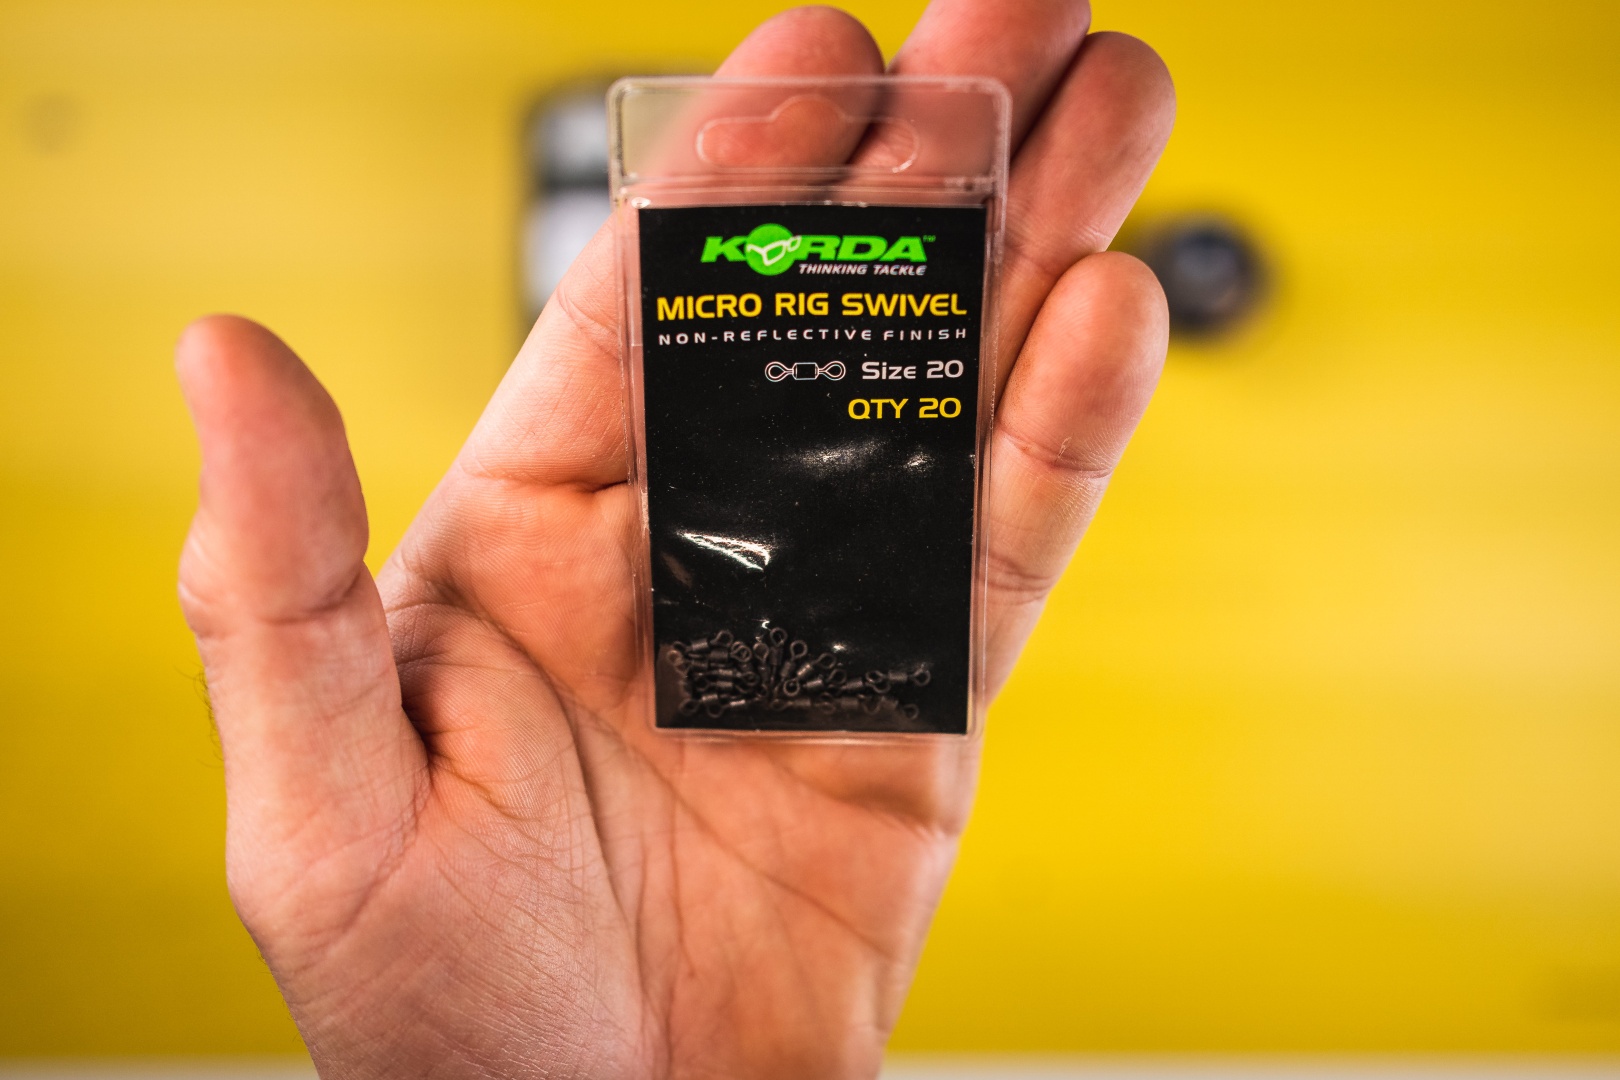
9 Prepare micro swivels. I use micro swivels that provide the bait with much greater freedom than just a ring, making the bait behave more naturally when it is sucked in by the carp.
10 Thread the large loop you created earlier through the eye of the classic swivel micro swivel or the ring present in the micro ring swivel model.
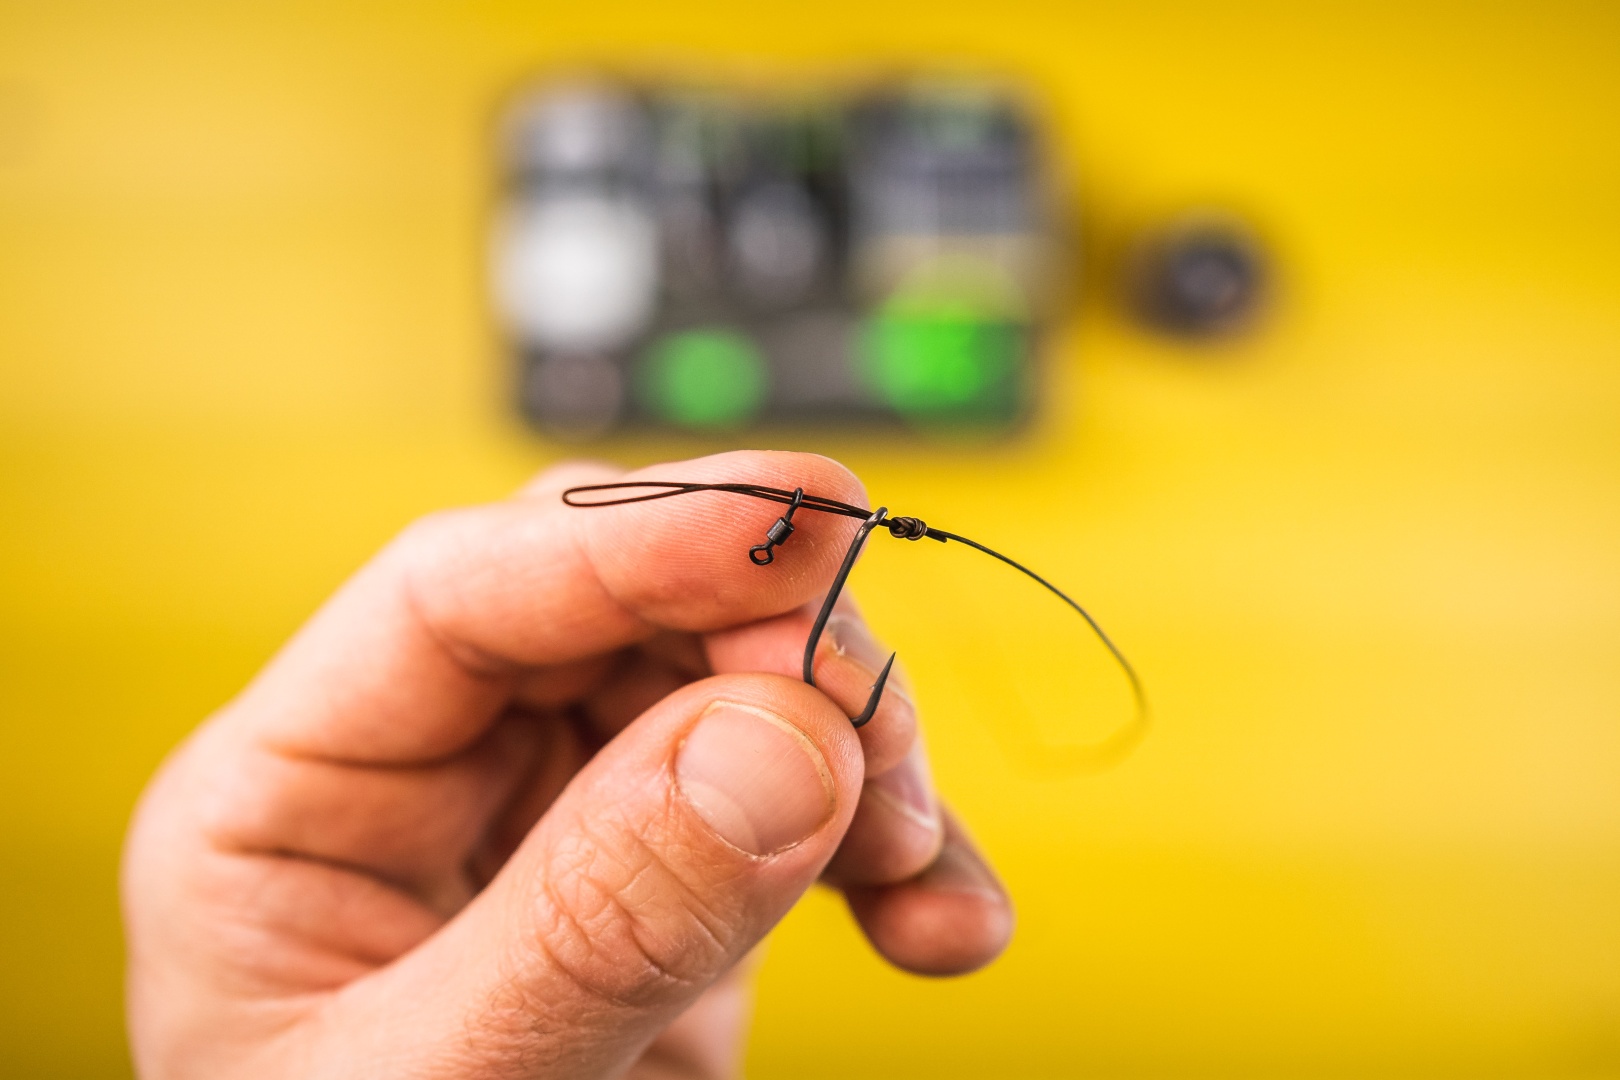
11 Pass the remaining part of the loop through the eye of the micro swivel and over the hook point, then adjust the sliding length in relation to the length of the hook shank. I try to keep the lower part of the loop below the height of the hook point.
12 Select a hair rig aligner that matches the size of your hook.
13 Slide it onto the braid and then push it onto the hook eye and part of the shank. I use ready-made aligners, which are flexible and can be reused multiple times.
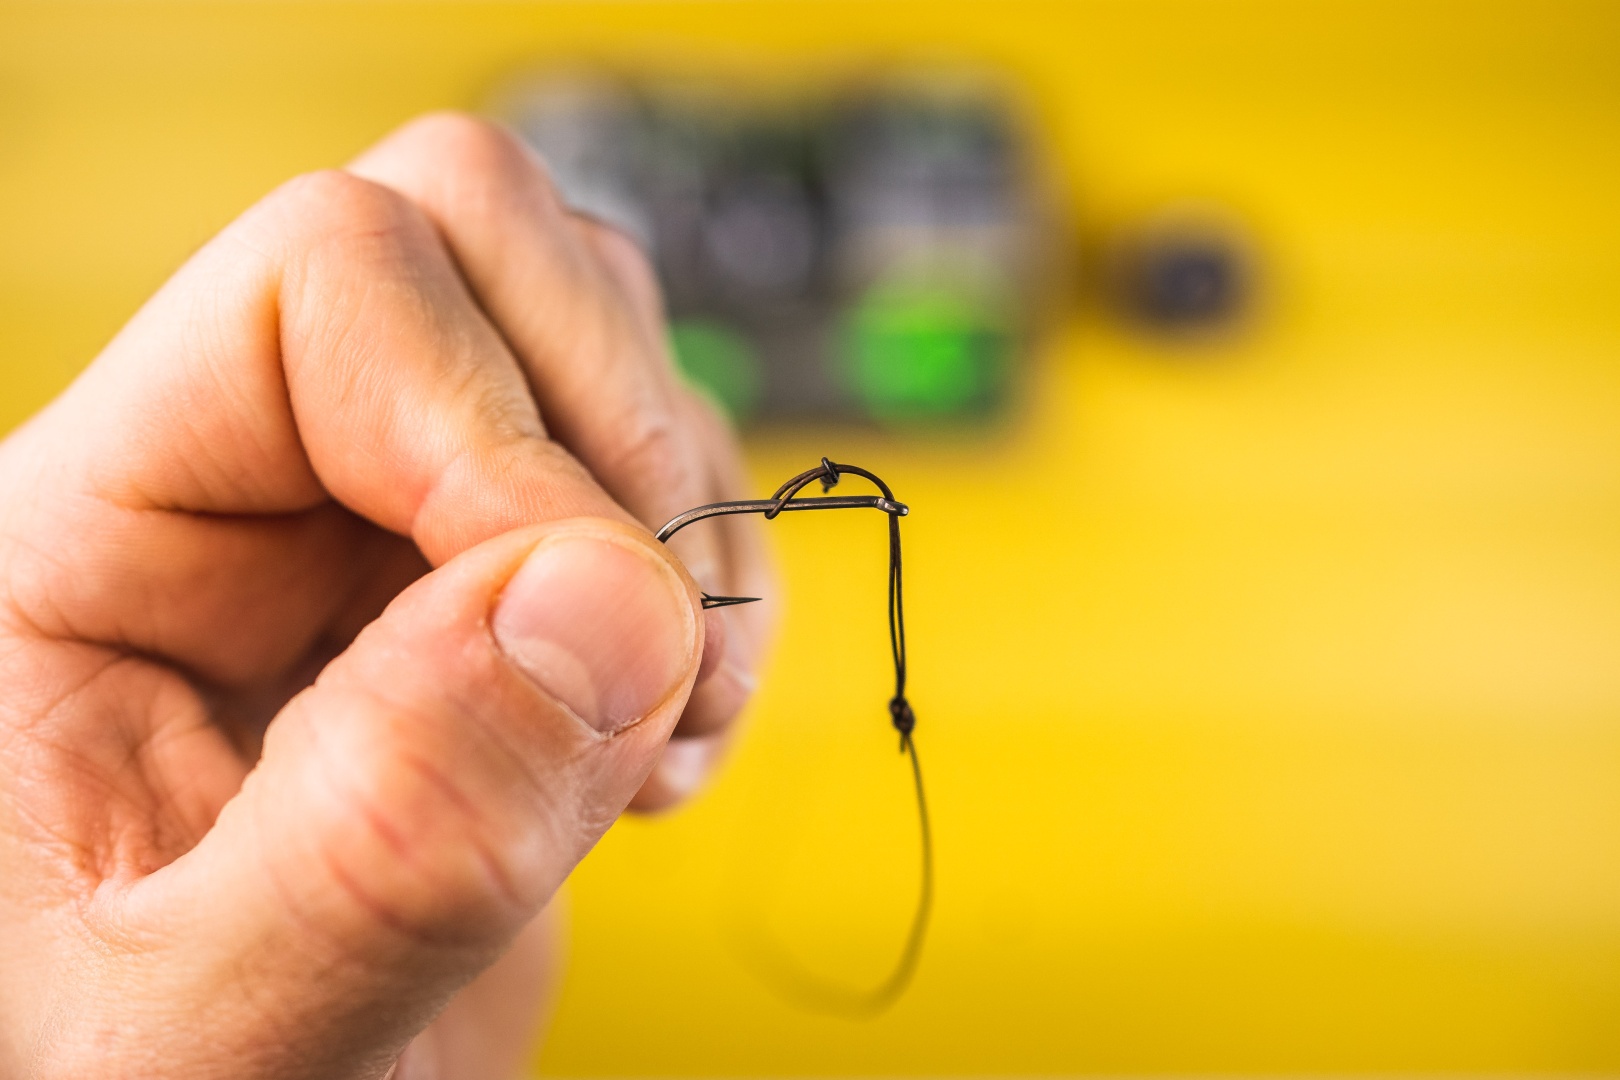
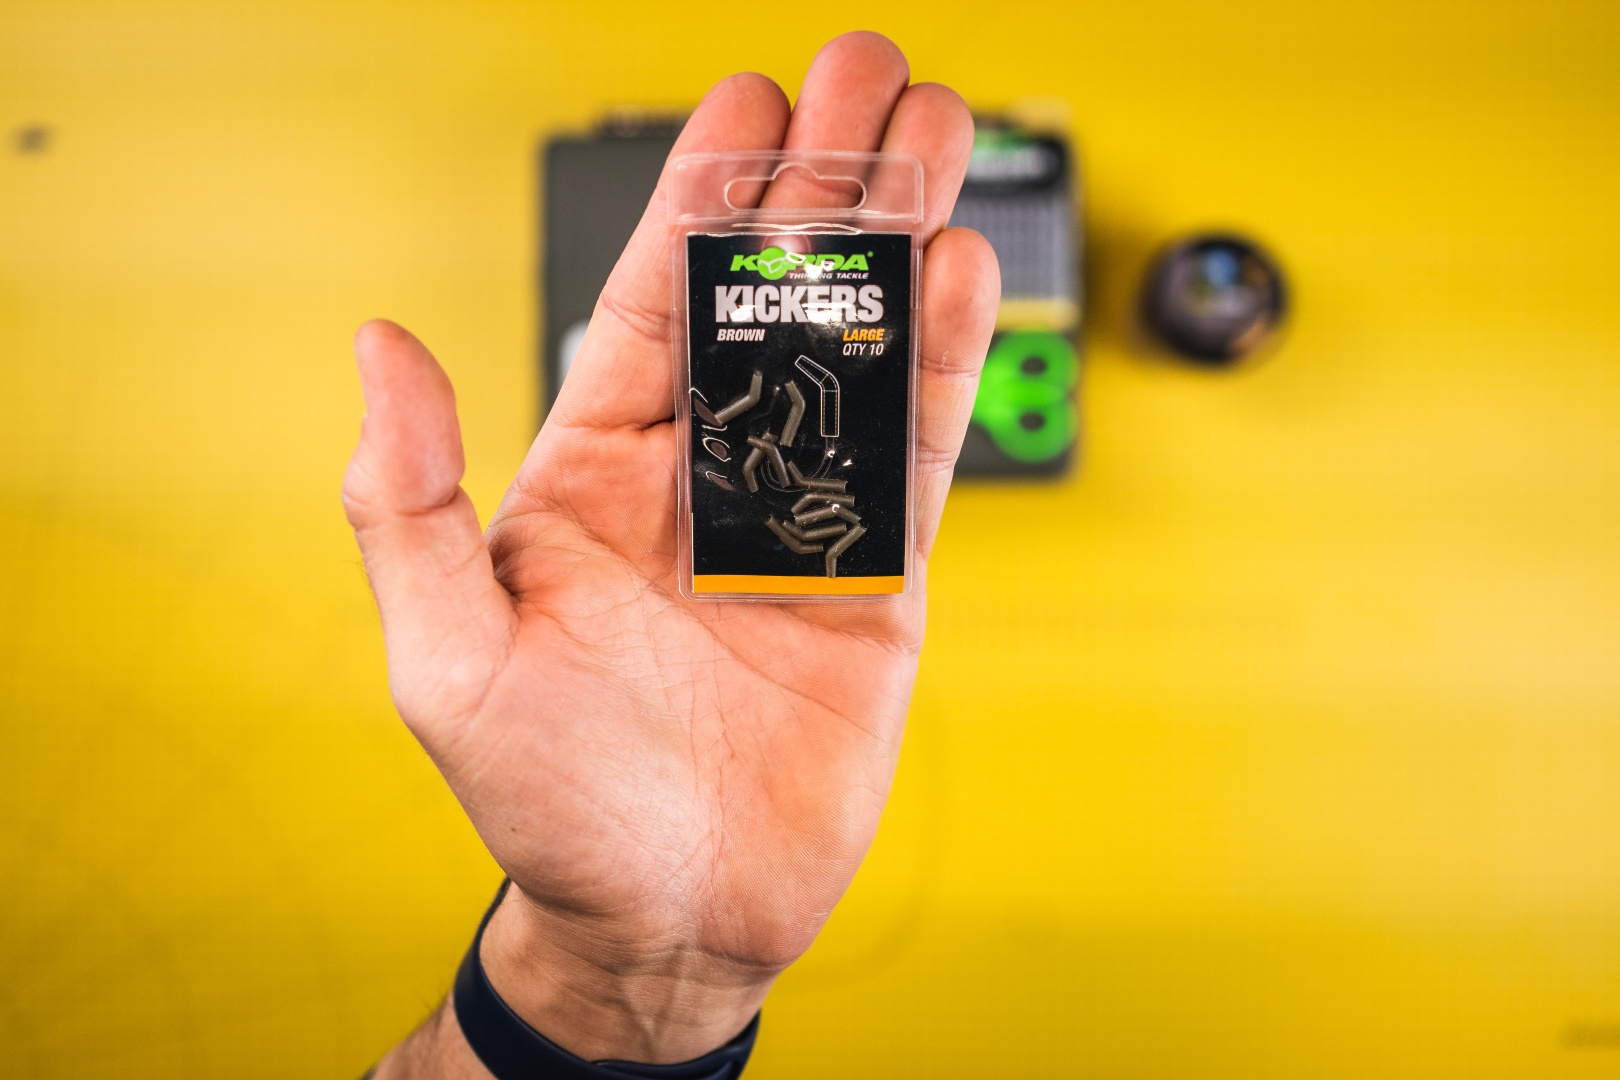
14 Prepare your weight in the form of a balancing paste or a balancing bead.
15 At the knot area on the loop above the positioner, place a small amount of putty weight or a heavy bead, known as a kwick. This type of weighting will ensure that the leader hugs the bottom more effectively and will cause the hook to rotate towards the carp's lower lip more quickly after it has been sucked in.
16 First part of the rig is ready!
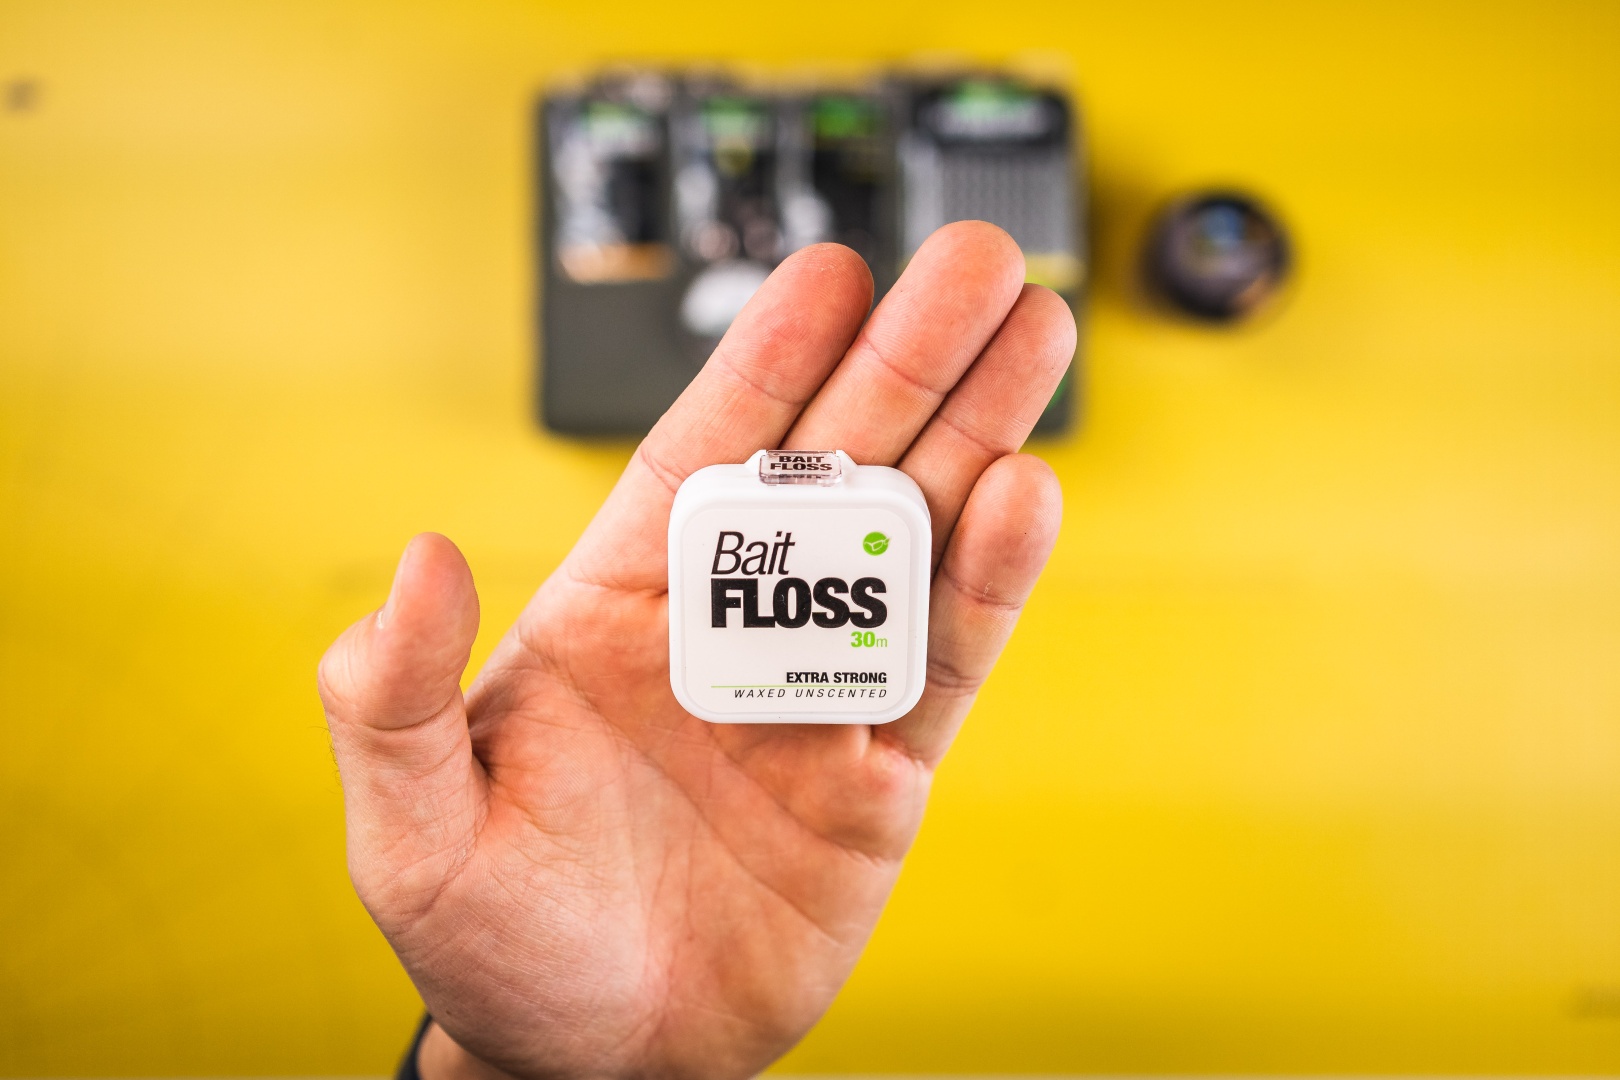
Now it's time to attach the bait. I use two methods for securing the bait, and for both, I utilize Bait Floss. The first method involves creating a stopper using the flame from a lighter:
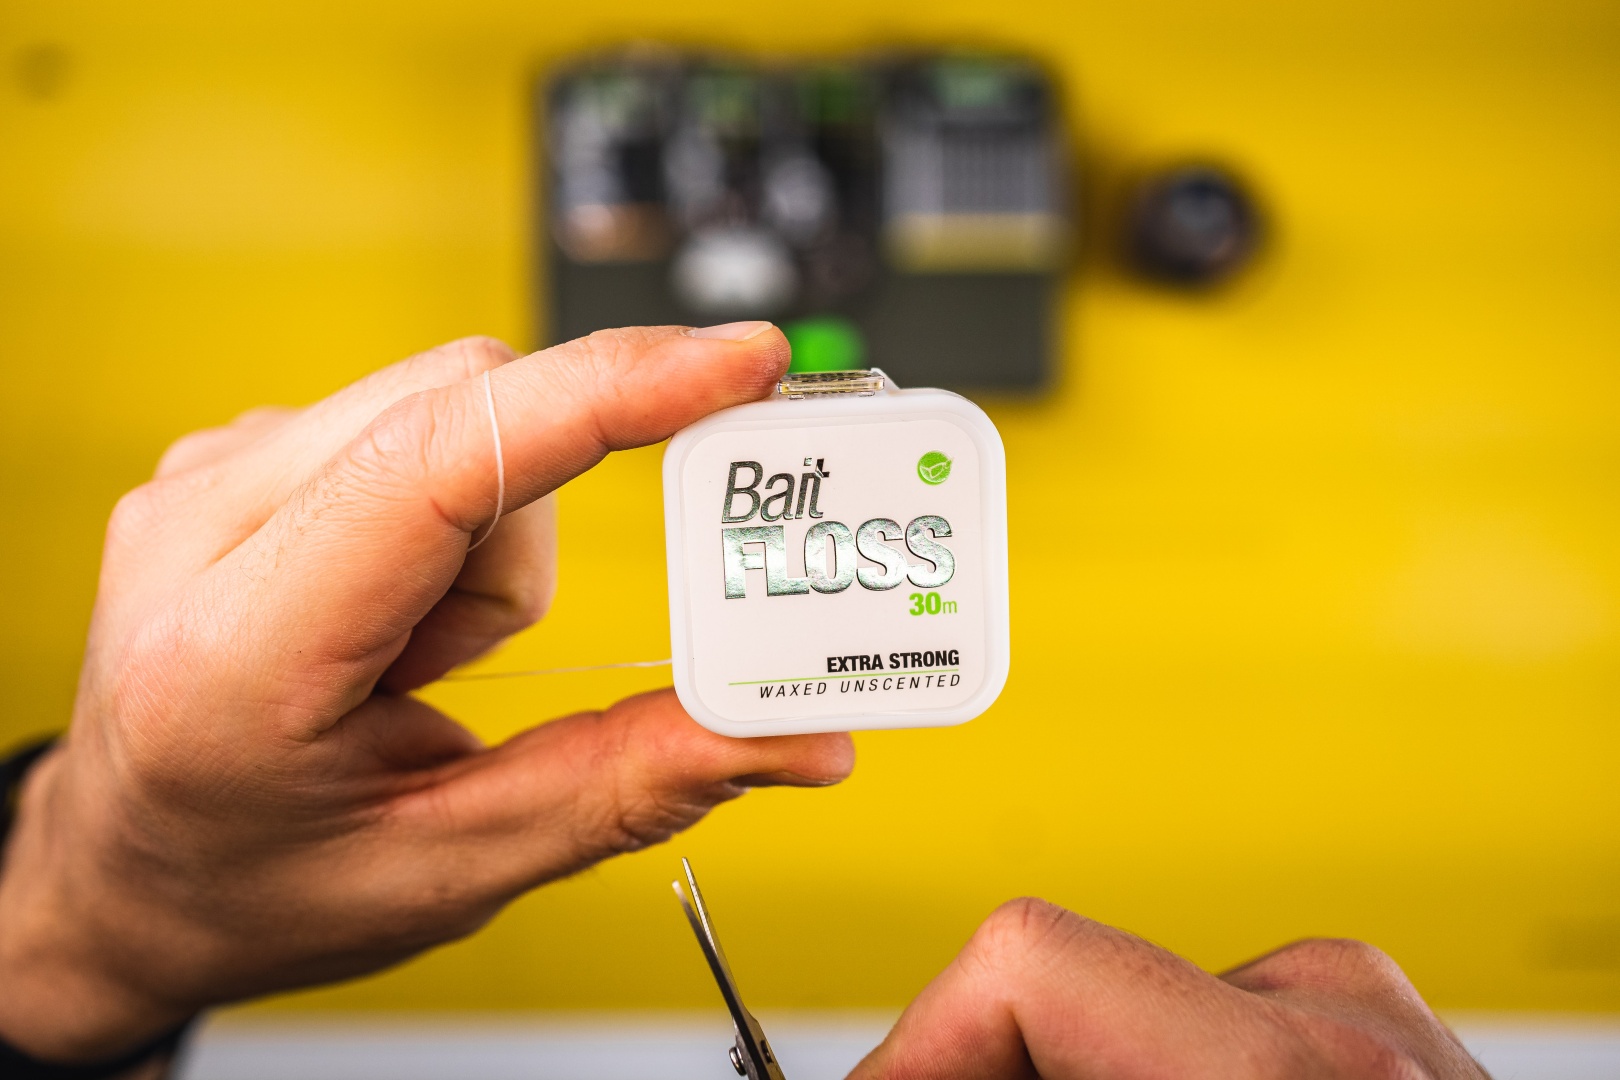
17 Prepare the thread and then cut the required length.
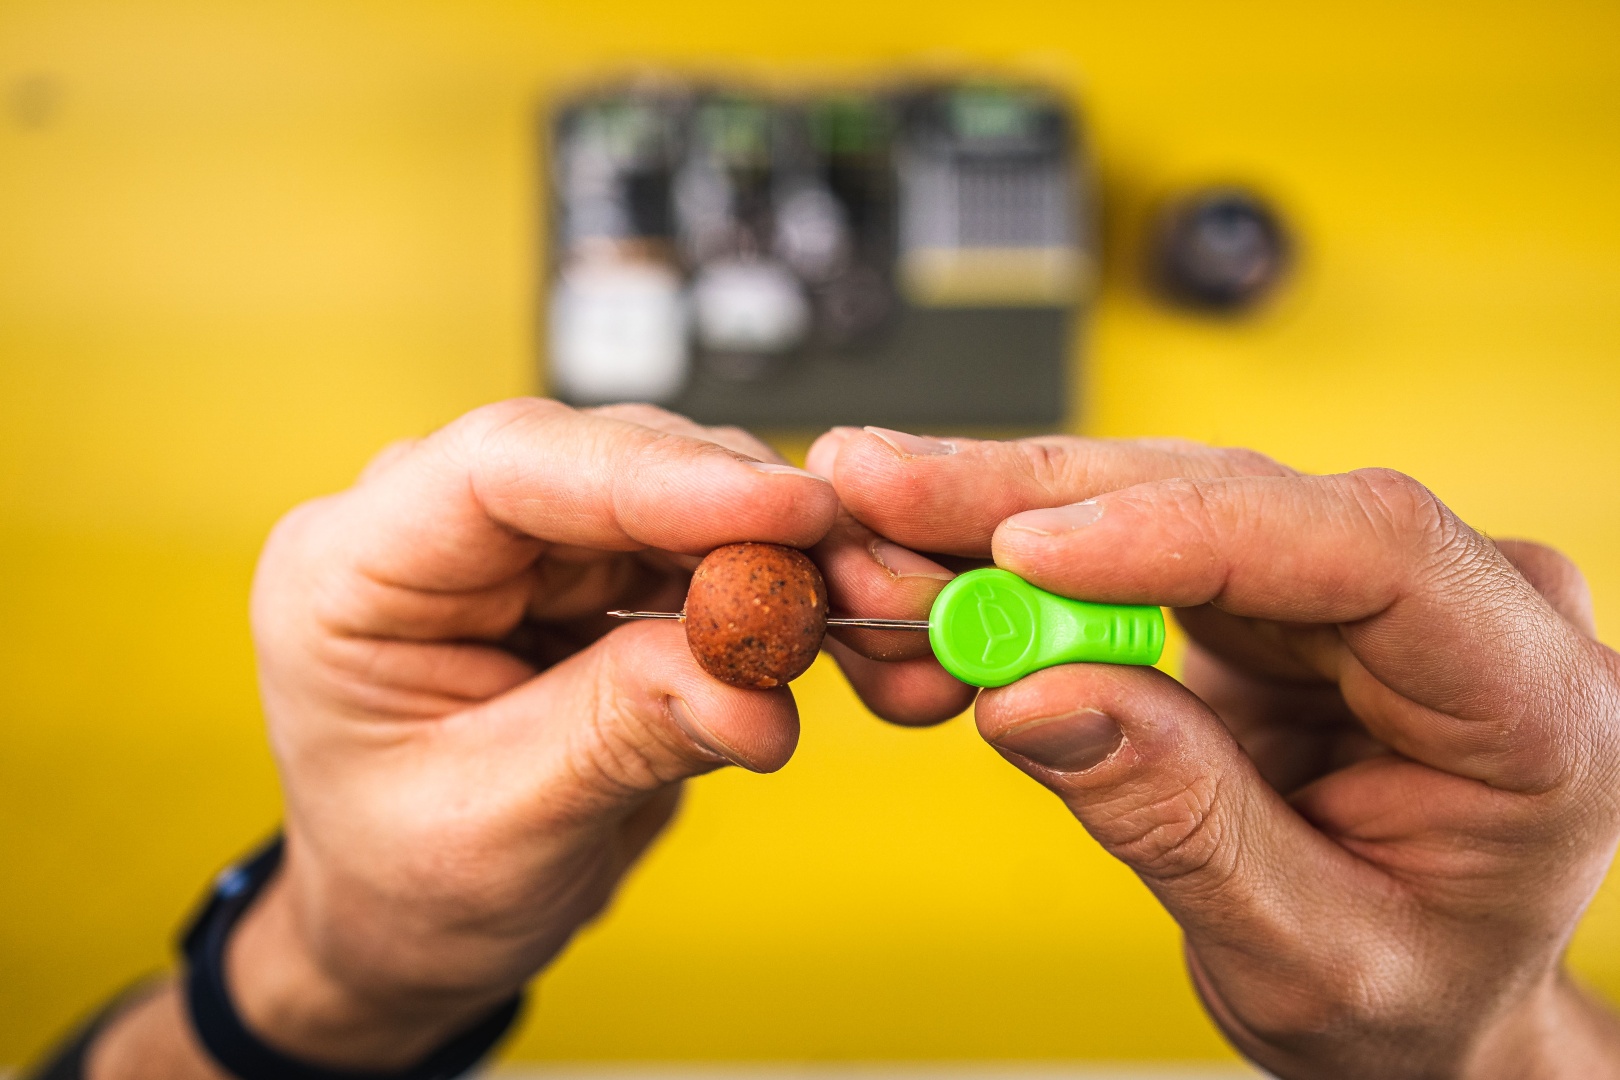
18 Prepare your bait and thread it onto a baiting needle.
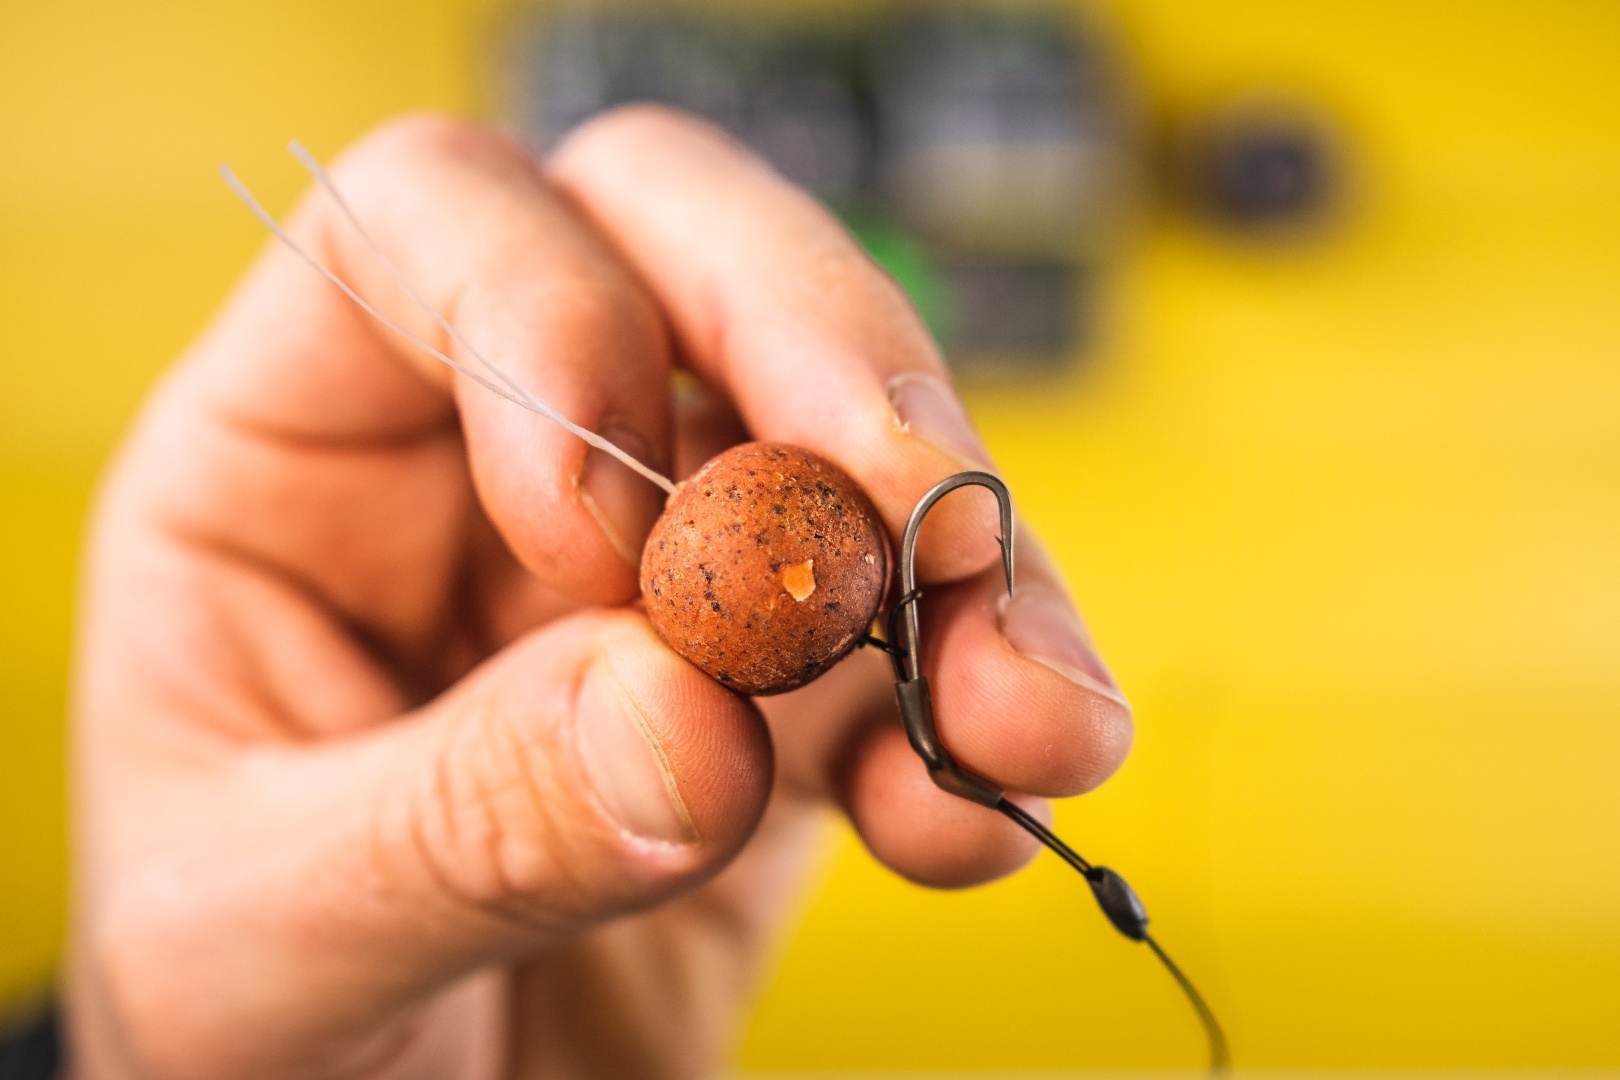
19 Thread the cut section of Bait Floss through the eye of the micro swivel and position it so that its ends are of equal length.
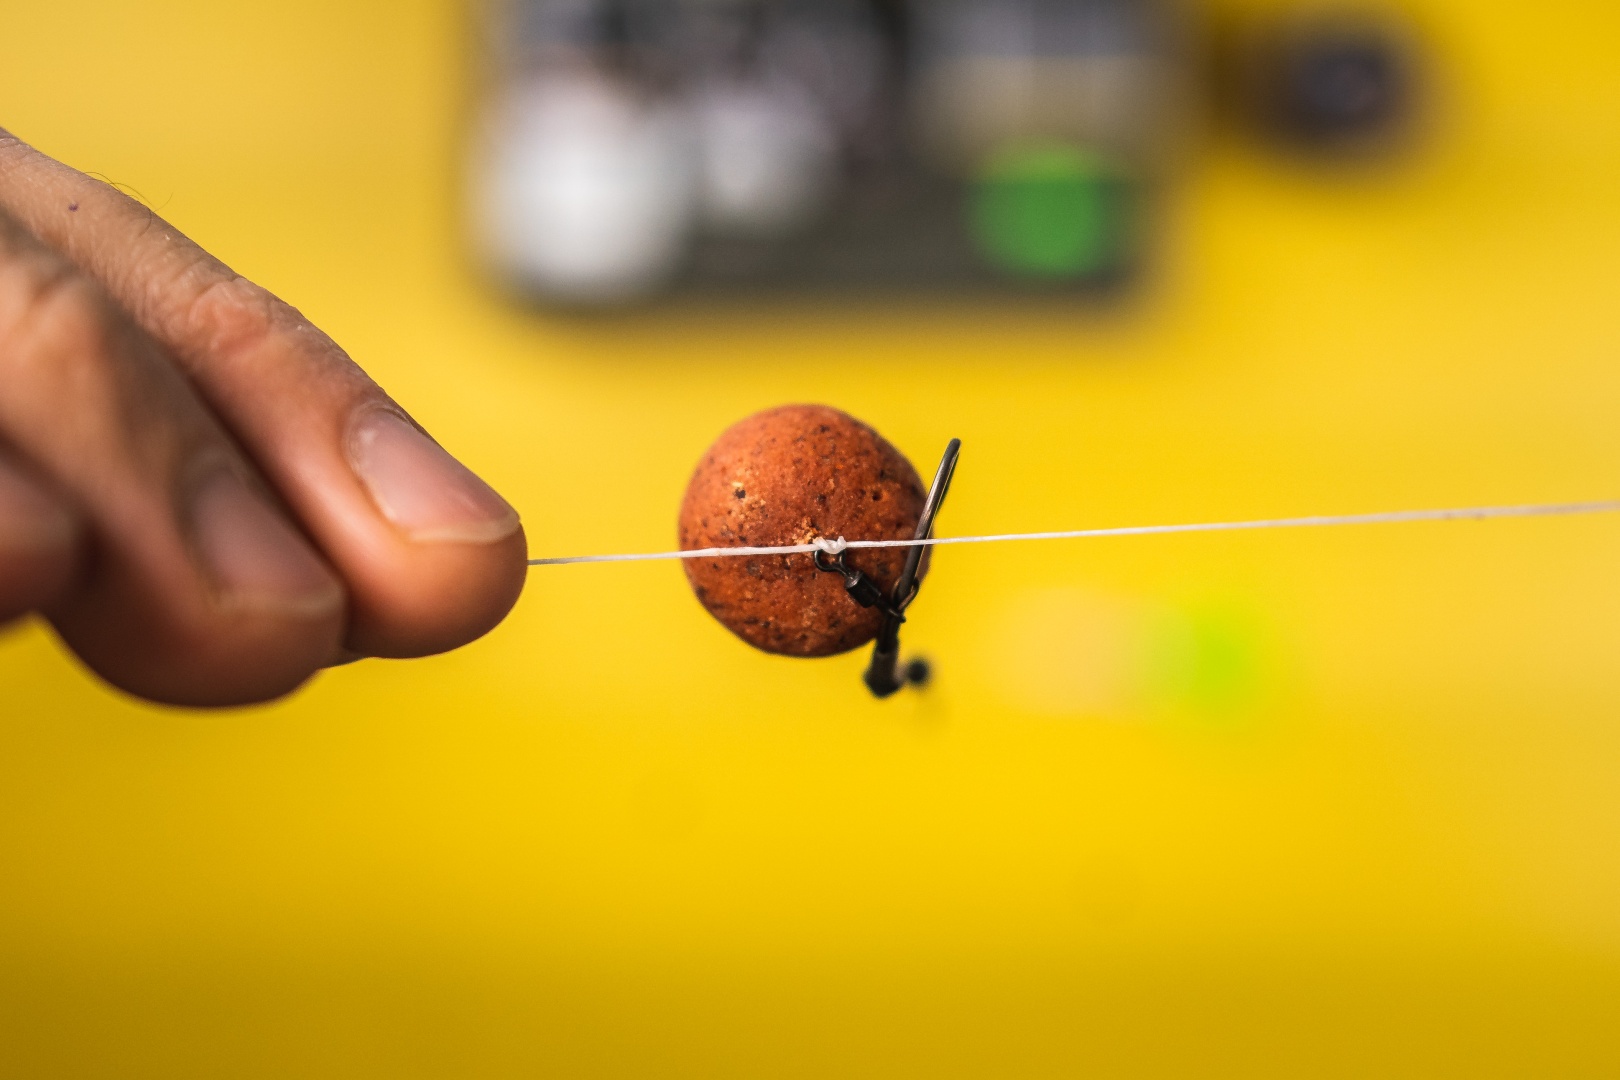
20 Thread the bait onto the line. Remember to pass both ends of the line through the bait.
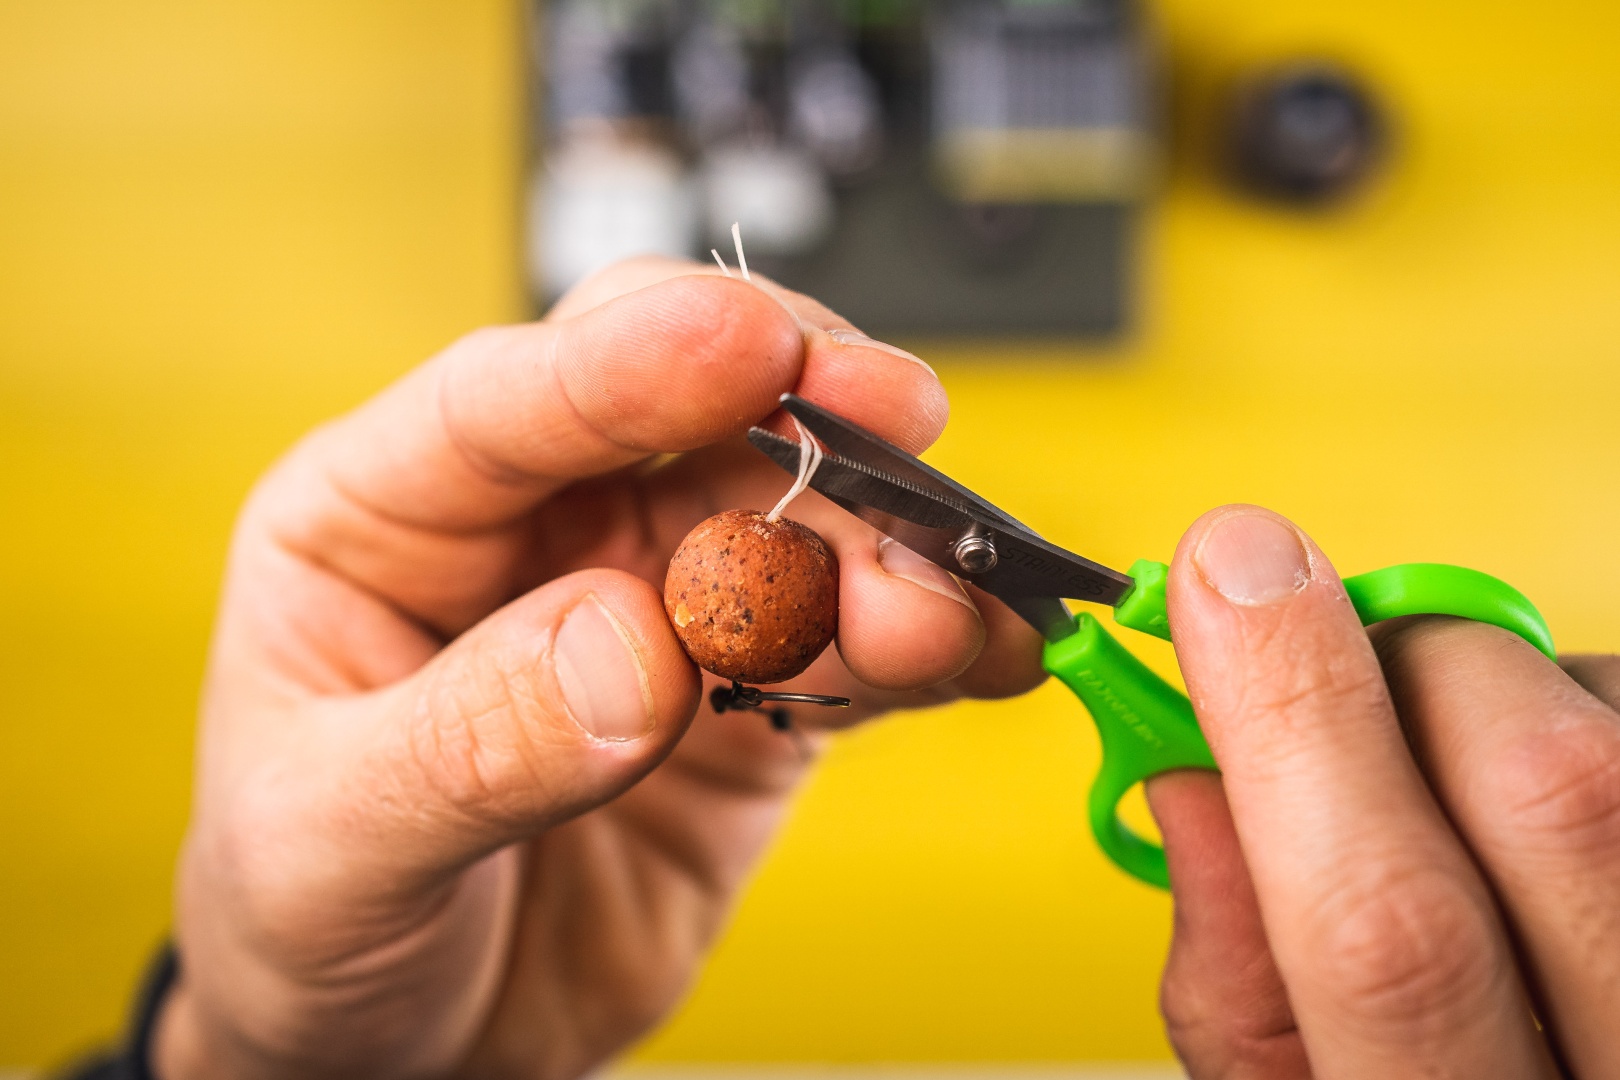
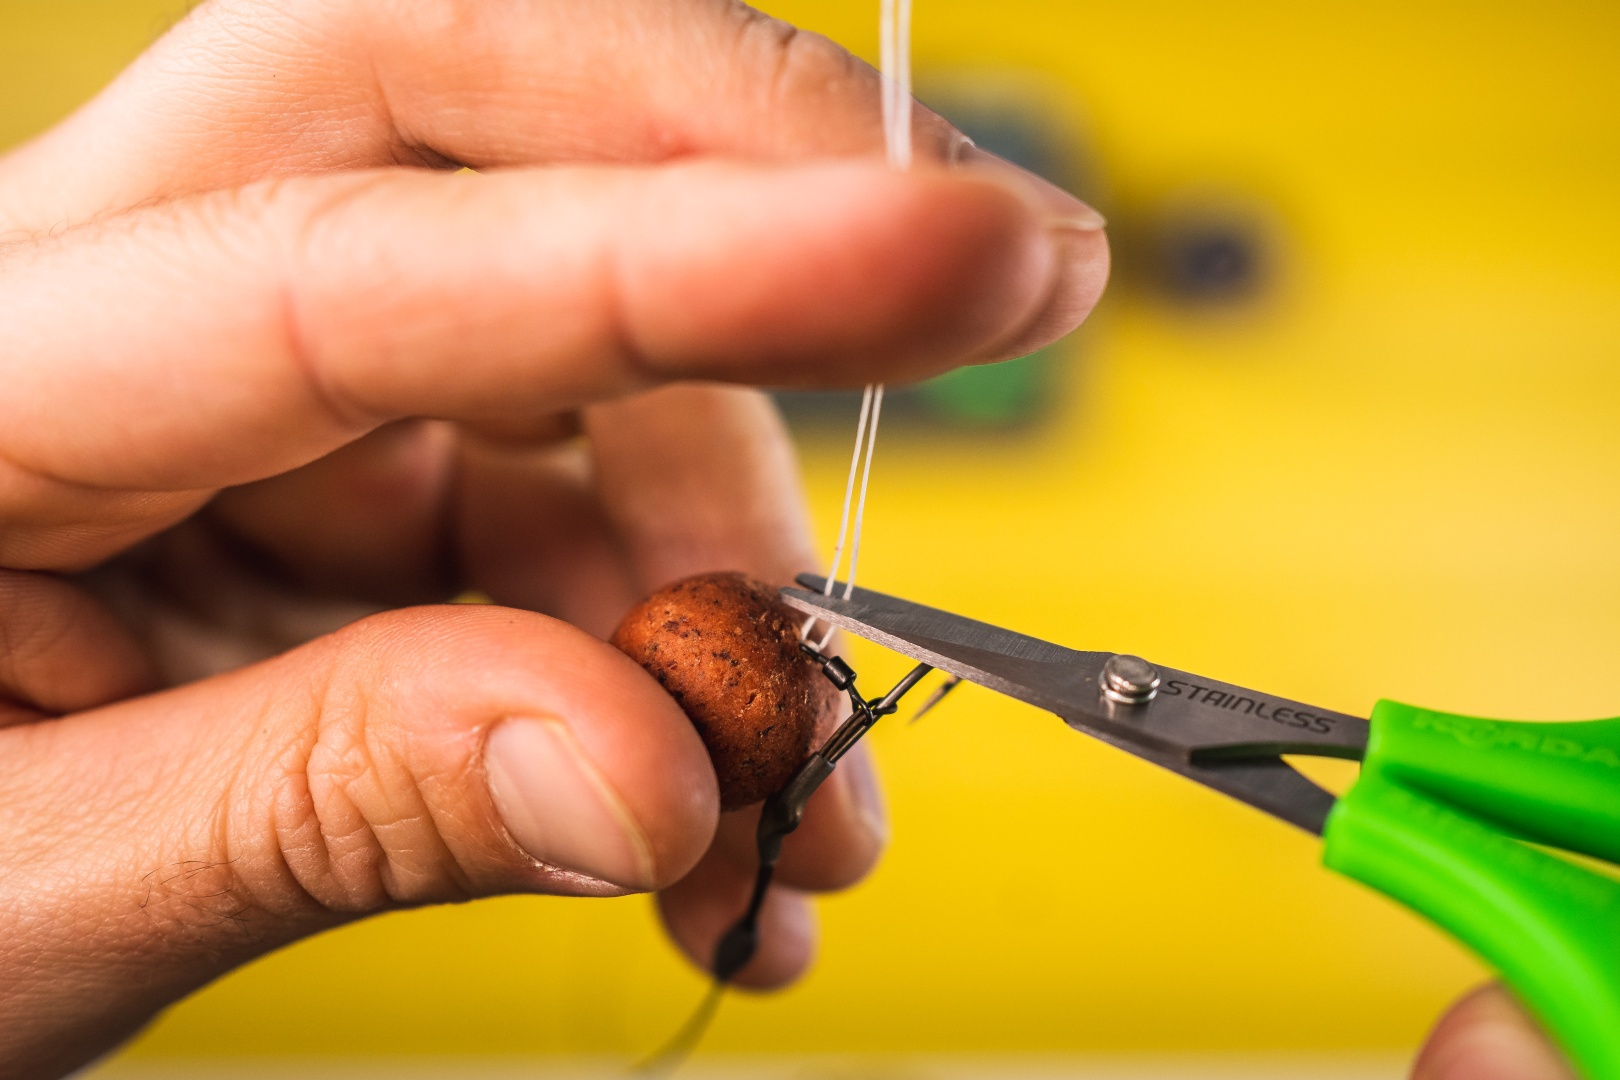
21 Trim any excess thread, leaving ends about 1-1.5cm in length.
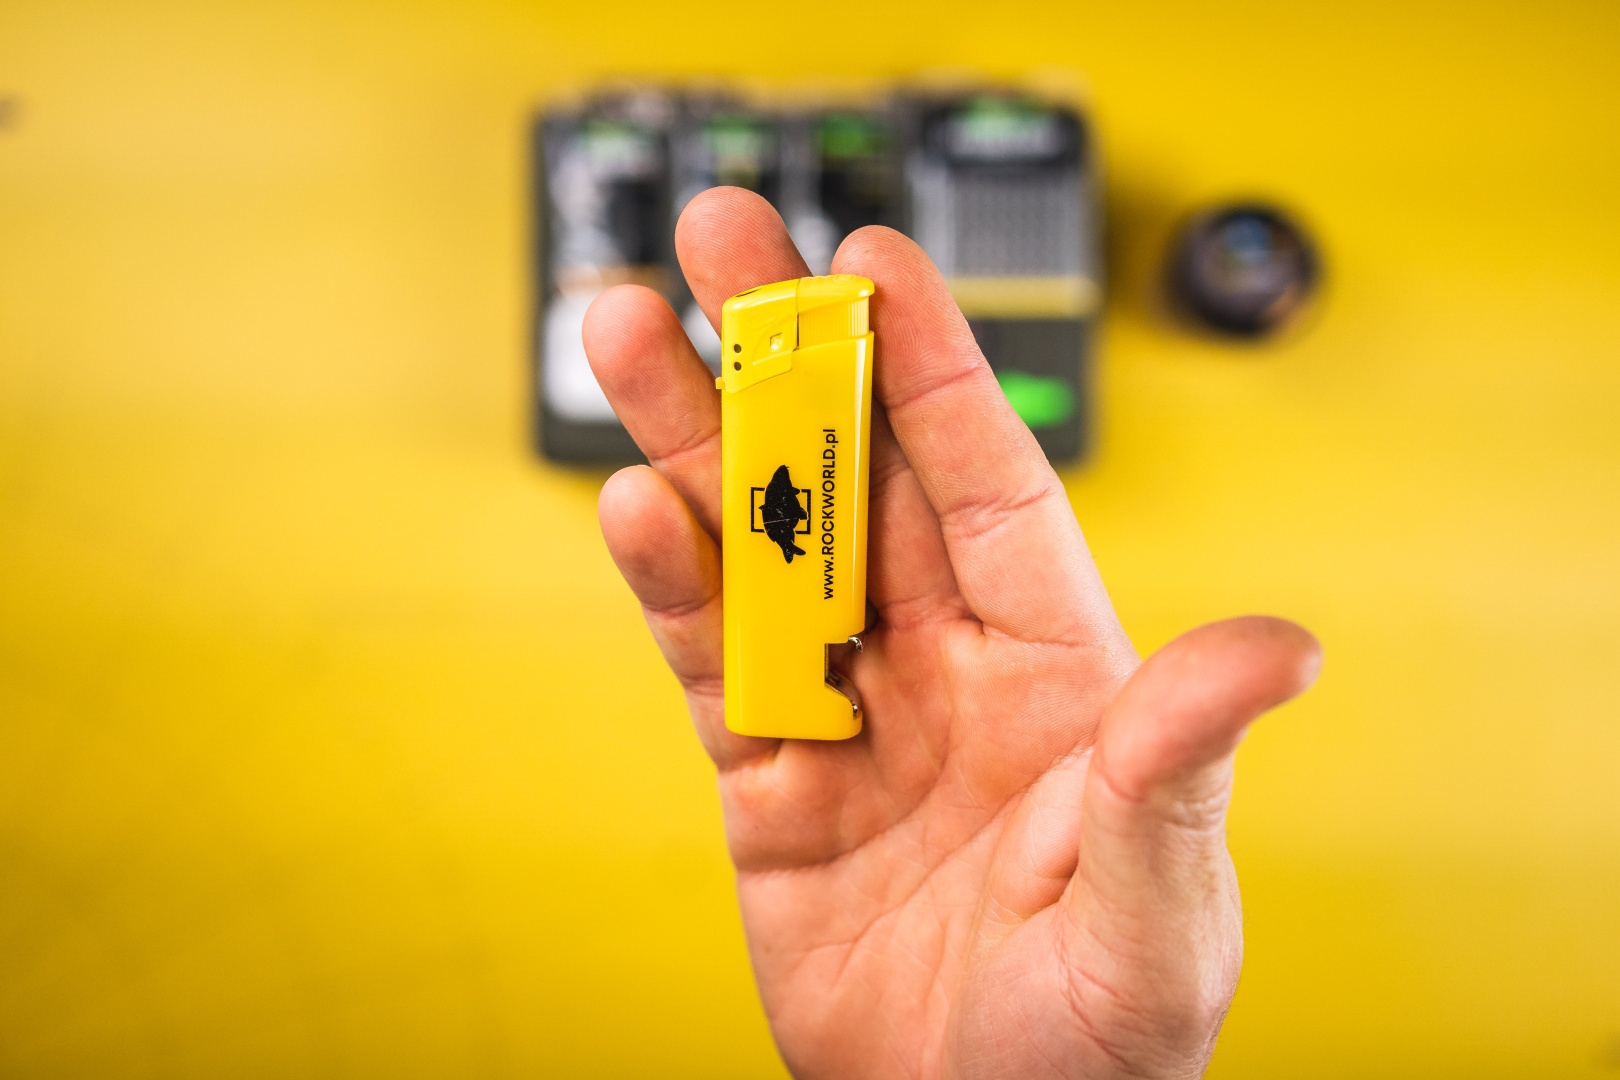
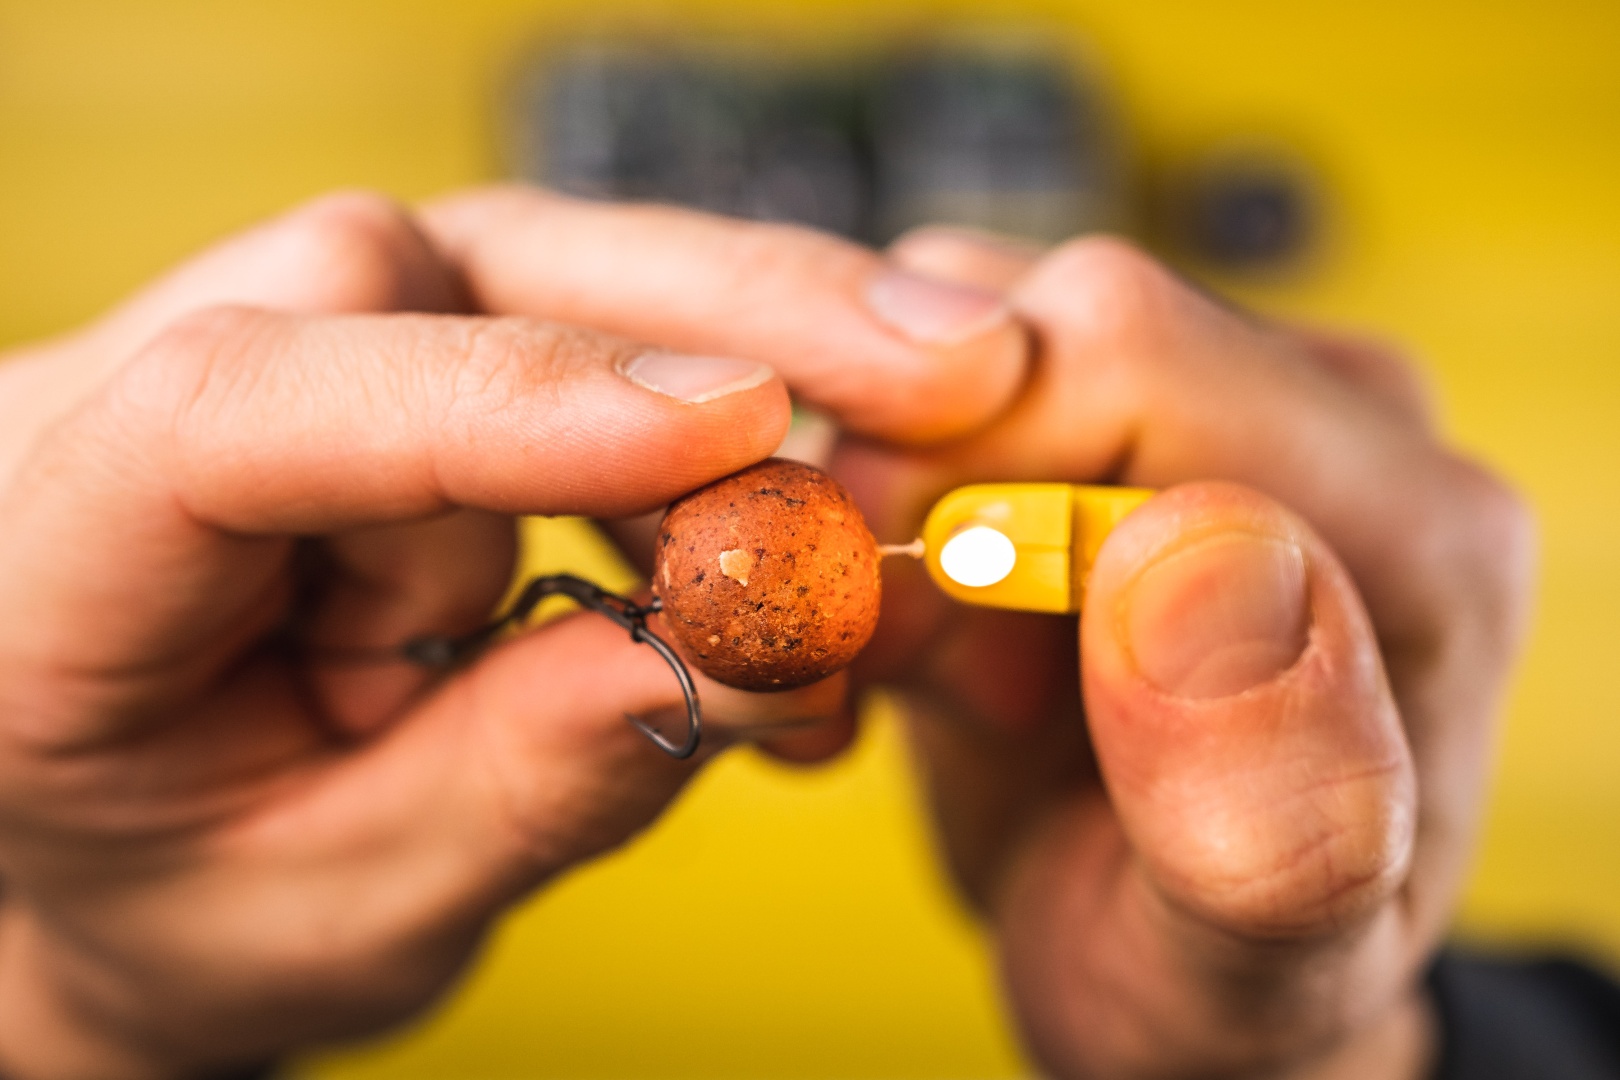
22 Prepare your lighter.
23 Using a lighter, singe the remaining ends of the Bait Floss.
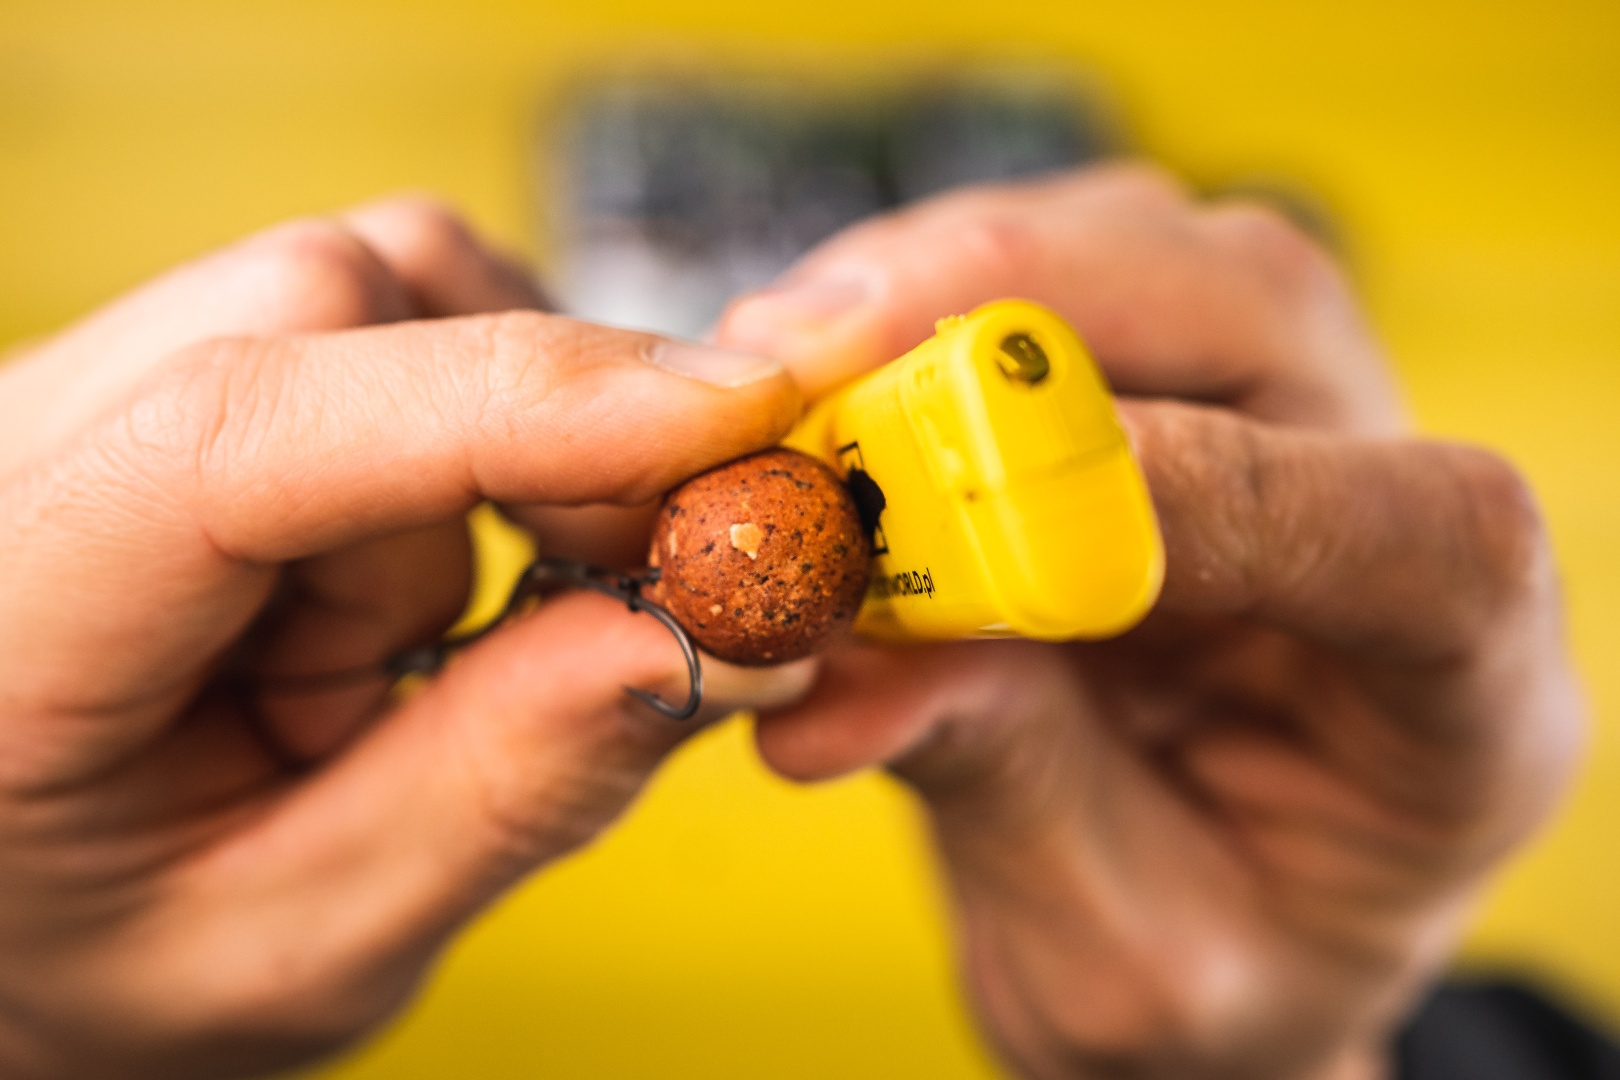
24 Immediately after scorching "on the spot," use the side surface of the lighter to form a "stopper" that blocks the bait. Done!
25 The second method I use for bait attachment involves the use of Bait Floss and a classic boilie stopper. As with the previous steps, prepare your bait, skewer it onto the needle, and thread it onto a pre-cut section of Bait Floss. When threading the bait, the floss should be folded in half. Place the stopper onto the created "loop" of the floss, then pull the floss tight so that the stopper sits snugly against the bait. Tie the remaining ends of the floss to a micro swivel.
26 Trim any excess thread remaining.
27 Ready! Bait secured with the help of a stopper and baitfloss thread.
Contact Information
Brick and Mortar Store: ul. Mikołaja 9A, 47-400 Racibórz tel. +48 883 474 729